Wicking Garden: “A wicking bed is a garden bed with a waterproof lining that holds a reservoir of water at the bottom from which water is drawn upwards like a wick to the surface of the bed via natural soil osmosis or through the roots of plants in the bed. Basically it works like large Decor self-watering pot.”
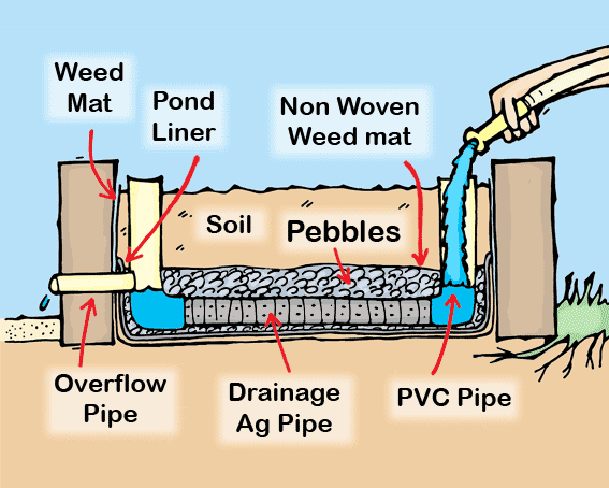
A reference diagram to help understand the concepts of a wicking garden
The wicking garden is an amazingly effective and simple to build gardening system. To build one, you will need:
- Western Red Cedar
- Galvanized Corner Brackets
- Screws & Washers
- Weed Barrier
- At least 45 MM rubber pond liner
- Geotextile Pond Underlayment
- PVC Pipe and Couplings
- A toilet flush valve (you’ll see)
- Gravel
- Soil
- Water
- And of course the tools: wheel barrow, shovels, picks, level, drill, staple gun, circular saw.
Start off by making a drawing so you know how much of each material you will need. Keep in mind, you are building something that will be filled with water so search for the lowest part of your garden for construction.
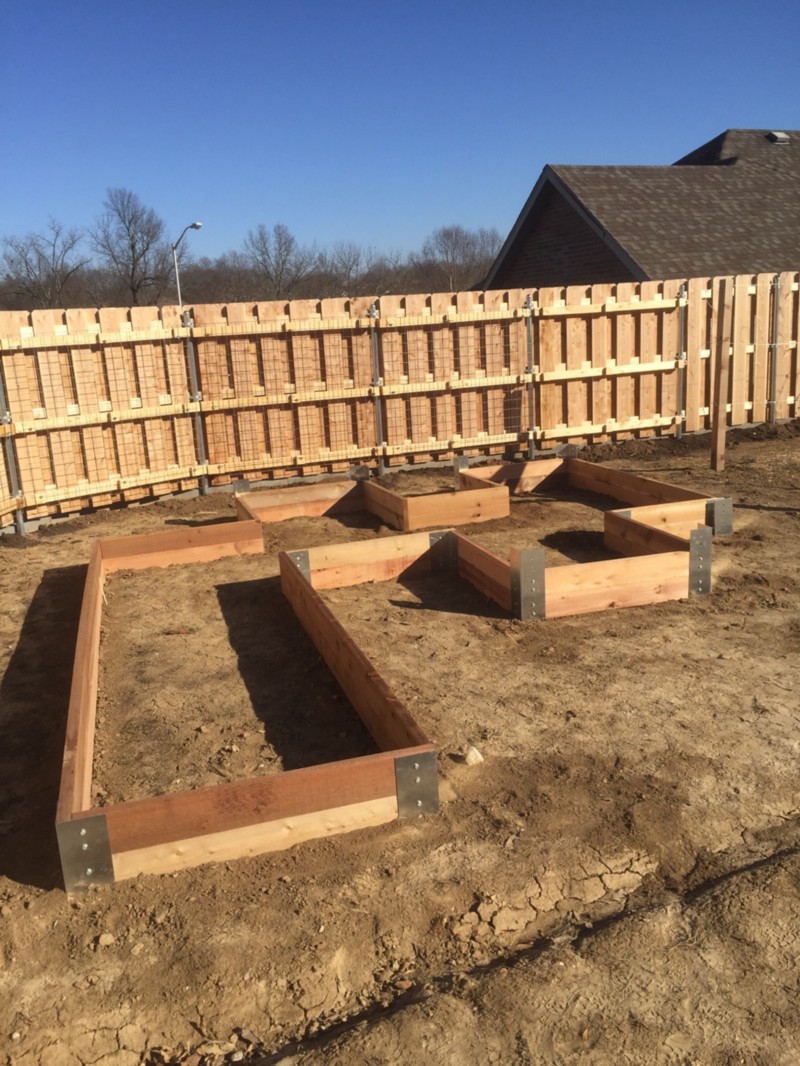
Make sure the garden frame is at least 18 inches above the ground at its lowest point so nothing spills over.
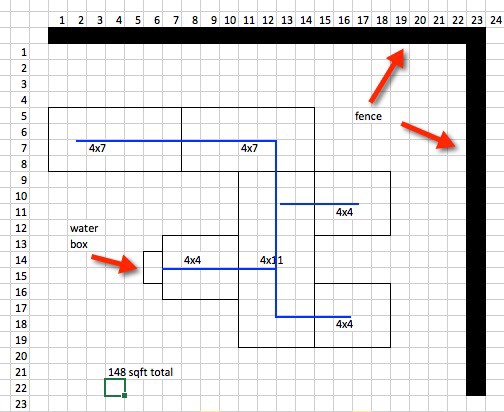
Next, level the ground where you will be building the bed. There are multiple ways to do this, including the use of a leveling tool. Once you are finished, it should look something like this…
Before you begin to fill your bed with dirt, you have some work to do to make this baby self watering.
Using a heavy staple gun, secure the geotextile to the bare ground. This will lay the groundwork and protect your pond liner.
Once in, install the pond liner. This will rest approximately 12 inches off the ground. The liner must be level with the ground (and your bed) to avoid leakage. Use the screws and washers to secure the pond liner to the garden bed. Fasten the liner to the bed every 4 to 6 inches. Once complete, fill the liner with gravel, leaving 2 to 4 inches of space to install the PVC pipe.
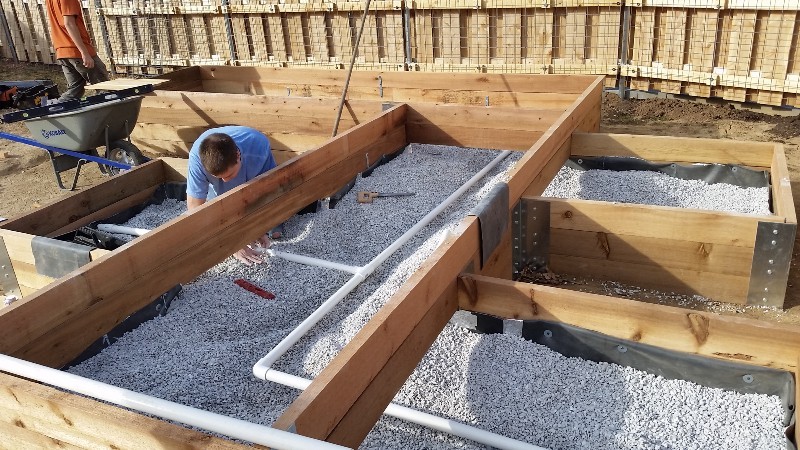
Pictured in use is 2×6 western cedar. Each board is 6 inches wide.
Using a box like that pictured below, you will hook up the toilet flush valve and PVC pipe. Follow the same methods as above, regarding the geotextile and liner and drill a hole large enough for the PVC pipe to fit through. You can use a horse clamp to make sure there is no leakage through the hole.
Put the toilet flush valve in the box and set it to the level of the PVC pipe. The valve is attached to a water catchment system uphill from the garden; from here, the water will fill the entire garden bed and will shut off when the are is filled to maximum.
After this is in place, install the rest of the PVC pipe. Run a single line to every are of the garden bed. Put 1 hole every 6 inches along the pipe so the water can fill the bed quickly. Now install a second PVC pipe to act as an overflow drainage pipe. Put this at the level you want the water to get to and have it dump the water outside of the garden bed…
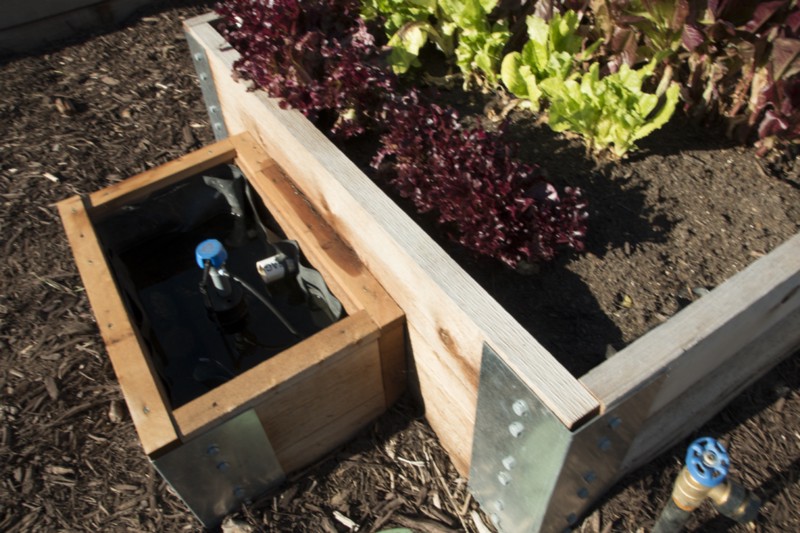
Toilet flush valve box
Once here, fill the bed with water and make sure there are no leaks. Let it stand for 24 hours; if it all works right, you’re ready to move on.
Next, lay your weed liner on the gravel on top of the PVC pipe so that the soil doesn’t get into the water. Use the staple gun to keep the weed liner attached to the garden bed. Now add the soil. You now have a self-watering garden (via Minds)!
If you like this idea, be sure to share it with your friends and inspire someone you know. Anything becomes possible with just a little inspiration…
