How To Become More Self-Sufficient Without Starting a Full-Blown Farm…
Want to start preserving your harvest, making your own soap, or building a backyard root cellar — but not sure where to begin? “Homesteading Advice” gives you instant lifetime access to 35+ practical homesteading books on food preservation, veggie gardening, DIY natural cleaning products (save over $250 per year with this skill alone), brewing, off-grid energy, and a whole lot more…
Click Here To Check It Out Now!
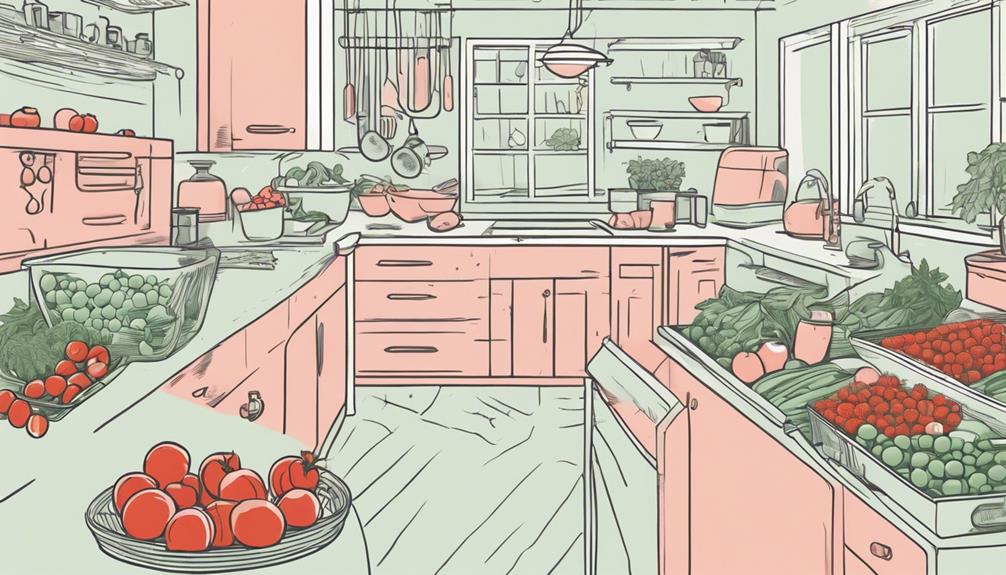
“Hi, I’m experiencing a bit of an overflow in my small backyard farm in Christchurch, New Zealand. My garden has been quite productive this season, something I’m really grateful for, but now I’m left with more fresh fruits and veggies than I can consume before they spoil. I’m not ready to invest in any fancy preservation tools yet, and I don’t want to waste any of my hard work. Is there a simple method to freeze these fresh produce that won’t compromise their quality too much? I’d appreciate some detailed guidance on how to properly freeze everything from leafy greens to root vegetables, and maybe even some berries, if that helps. Thanks in advance!” Thanks, Patrick, Christchurch, New Zealand.
Firstly, let’s take a moment to appreciate the bounty you’re harvesting in your backyard farm, Patrick. It’s a testament to all the hard work you’ve put into your garden. Backyard farming is a joy, but dealing with more produce than one family can eat can be a challenge. Freezing your fresh produce is a fantastic way to extend the life of your harvest, and the good news is, with the right techniques, you can maintain much of the flavor, texture, and nutritional value of your fruits and vegetables.
Why Freeze Fresh Produce?
Freezing your freshly harvested fruits and vegetables is one of the most accessible and efficient methods of food preservation. It doesn’t require a lot of fancy equipment, and it retains much of the nutrients in your produce. Plus, it allows you to enjoy your home-grown fruits and veggies year-round without needing to rely on store-bought produce. There are many reasons why freezing is a great choice:
- Convenience: Freezing allows you to process food in manageable amounts. You don’t have to do everything in one go.
- Cost-Effective: You get to use what you’ve grown, and you aren’t wasting your hard-earned harvest.
- Quality Control: You control the quality of the produce you freeze, ensuring it’s the best possible condition.
- Less Nutrient Loss: Compared to other preservation methods, freezing retains most of the nutrients, color, and taste.
The Basics of Freezing Produce
Before you start freezing, it’s important to understand that not all produce freezes equally well. Some fruits and vegetables hold their texture and color better than others. Here’s a step-by-step guide tailored to freezing common backyard farm produce:
1. Harvest at Peak Ripeness
The quality of the produce you freeze largely depends on the condition it’s in when you freeze it. Only freeze fruits and vegetables that are at their peak ripeness. That’s when they have the best flavor, color, and nutrient content. Overripe or underripe produce tends to lose its quality when frozen.
2. Wash, Dry, and Prepare
Patrick, you’ll want to start by thoroughly washing all your produce. This ensures that dirt, pesticides (if you’ve used any, although home gardening is often chemical-free), and any bacteria are removed. Here’s how you should approach this step:
- Rinse Under Cold Water: Use a soft brush when necessary to clean your fruits and vegetables thoroughly. Avoid soaking produce for too long, especially delicate fruits, as it may lead to waterlogging, which can affect the texture when thawed.
- Dry Completely: Moisture can cause ice crystals to form, leading to freezer burn. Use pads of paper towels or clean dishcloths to dry your produce.
- Cut, Peel, or Dice: Prepare your vegetables and fruits in the way you’re most likely to use them. For example, trim the ends, remove peels if needed, and chop into suitable sizes. If you prefer, you can freeze whole items like berries or small peppers directly.
3. Blanching: An Essential Step for Vegetables
Blanching is a process where vegetables are scalded in boiling water or steamed for a short period, then plunged quickly into ice water to stop the cooking process. While it may seem like an extra step, it’s crucial and has its benefits:
- Preserves Color and Texture: Blanching helps maintain bright colors and a fresh texture by stopping enzymes that might lead to spoilage even in the freezer.
- Reduced Freezer Burn: Blanched vegetables are less prone to freezer burn, which can ruin both taste and texture.
- Extended Shelf Life: Blanching contributes to longer-lasting frozen produce.
Here’s a quick guide for blanching common backyard vegetables:
| Vegetable | Blanching Time (Minutes) | Tips |
|---|---|---|
| Green Beans | 3-4 | Cut into desired lengths |
| Carrots | 4-5 | Slice or dice |
| Broccoli | 3 | Cut into florets |
| Spinach | 2-3 | Wilts quickly, so monitor carefully |
| Peas | 1.5-2.5 | Shelled peas only, avoid pea pods |
Once blanched, move the vegetables quickly into an ice bath. This interrupts the cooking process, which would otherwise continue in residual heat. Dry your blanched vegetables well before freezing.
4. Freezing Fruits: The Flash Freeze Method
Fruits generally don’t need to be blanched, with a few exceptions. Most fruits benefit from what’s known as the flash freeze method:
- Spread on a Tray: After washing, drying, and preparing (hulling, slicing, etc.), place your fruits in a single layer on a large baking tray or cookie sheet.
- Freeze Individually: Pop the tray into the freezer for a few hours, or until the fruits are firm and individually frozen. This method prevents them from sticking together.
- Transfer to Containers: Once individually frozen, transfer the fruits into airtight containers or heavy-duty freezer bags.
This method is particularly useful for berries, sliced peaches, and other soft fruits that might mush together if frozen immediately in bags or containers.
5. Packaging for Freezing
How you pack your produce plays a significant role in preserving its quality in the freezer. You’ve done all that work blanching and flash freezing, now let’s make sure it stays fresh for a long time:
- Airtight Seal: Use heavy-duty freezer bags or airtight containers to prevent air from coming in contact with the produce, which can lead to freezer burn. Squeeze out as much air as possible before sealing freezer bags.
- Labeling: Make sure to label your containers with the name of the produce and the date you froze it. Keeping track of dates helps ensure that you use older items first and don’t let anything go to waste.
- Portion Control: Freeze in portions you’re likely to use in one go. This reduces the chances of thawing more than you need and having to refreeze leftovers, which can compromise quality.
6. Storing Frozen Produce
Now that your produce is properly packed, it’s time to store it in the freezer. The way you organize your frozen goods can help in maintaining their quality:
- Temperature: Keep your freezer at a consistent temperature of 0°F (-18°C) or colder.
- First In, First Out: Rotate your frozen produce so older items are easily accessible and used up first.
- Avoid Overcrowding: Give your items space in the freezer, at least until they’re completely frozen. This helps prevent temperature fluctuations which can lead to ice crystal formation.
Freezing Produce: Special Considerations
How to Freeze Leafy Greens like Kale and Spinach?
Leafy greens like kale, spinach, and collard greens require a slightly different approach to freezing. These greens can be challenging because they have a high water content and tend to wilt or become mushy when thawed. But don’t worry, Patrick, here’s a method to get the best out of freezing your leafy greens:
- Blanching: Blanch these greens for about 2-3 minutes in boiling water. This is the minimum amount of time needed to deactivate the enzymes that cause spoilage.
- Ice Bath: Immerse in ice water immediately after blanching to halt the cooking process.
- Drain: Drain thoroughly in a colander and then use paper towels or a salad spinner to remove excess moisture.
- Pack: Greens can be portioned by handfuls or packed into an airtight container or heavy-duty freezer bag. Flatten the greens out for even freezing.
What to Do About Moisture Roll-Off with High Water Content Veggies?
Cucumbers, zucchini, and even tomatoes are examples of high water content vegetables that don’t freeze well raw. They tend to become mushy upon thawing due to ice crystal formation within their water cells. Here are some handy tips:
- Slice and Salt: For vegetables like zucchini or eggplant, slice them and sprinkle with salt to draw out excess water. Let them sit for about 30 minutes, then blot dry with paper towels before freezing.
- Puree or Cook: For items like tomatoes, consider making sauces or purees and freezing those instead. This way, texture loss doesn’t matter as much.
Can You Freeze Herbs?
Patrick, you may have a bounty of herbs in your backyard as well, such as cilantro, dill, basil, or parsley. Luckily, freezing herbs is easy and extends their fresh flavors into your winter cooking. Two methods work particularly well:
1. Freezing Herbs in Oil or Water
This method works great for herbs you’ll be adding directly to cooked dishes:
- Chop Finely: Finely chop your herbs (basil, parsley, etc.).
- Tray Preparation: Place the chopped herbs into ice cube trays, filling each section halfway with herbs.
- Add Liquid: Cover with olive oil or water.
- Freeze: Once frozen solid, pop the herb cubes out and store them in labeled bags or containers in the freezer.
2. Flash Freeze Method
For herbs like thyme or rosemary, which you might want to use directly, try this method:
- Wash and Dry Thoroughly: Dry the herbs completely as moisture can lead to freezer burn.
- Lay on Tray: Spread the herbs out on a baking sheet and freeze quickly.
- Pack and Store: Once frozen, transfer to labeled airtight containers or freezer bags.
Troubleshooting Common Freezing Issues
Dealing with Freezer Burn
Freezer burn happens when air comes in contact with the frozen food, causing dry spots and affecting both taste and texture. If you notice discolored spots on frozen vegetables or fruits, it’s likely freezer burn. Here’s how you can minimize it:
- Air-Tight Packaging: Use vacuum-sealed bags or squeeze all the air out of the bags you’re freezing produce in.
- Utilize Wrapping Techniques: Wrap your produce in plastic wrap before placing it in a freezer bag, especially when freezing in larger containers.
- Quick Use: If an item does develop freezer burn, simply cut away the affected area after thawing. The rest should be fine to eat.
Maintaining Texture
Some vegetables can become mushy or soft when frozen and then thawed. To preserve the texture as much as possible, follow these tips:
- Proper Blanching: Follow recommended blanching times strictly.
- Provide Space: Don’t overcrowd your freezer—space allows air to circulate and things to freeze more rapidly.
- Use Quickly After Thawing: When you thaw frozen produce, try to use it immediately in soups, stews, or baked dishes. Serving raw or uncooked thawed veggies often leads to disappointment in texture.
Alternative Freezing Approaches
Freeze-Drying vs. Traditional Freezing
While perhaps not something Patrick is considering starting out with, it’s worth mentioning freeze-drying as a related preservation method. This method removes nearly all the moisture content from food, creating a shelf-stable product that can last for years. Unlike regular freezing, freeze-drying preserves more of the food’s original structure, flavor, and nutrients. However, traditional freezing is often more economical and accessible for most households, making it the go-to choice for backyard farmers like yourself.
Since freeze-drying requires special equipment and tends to be more of an investment, freezing remains a highly viable and resourceful choice for most backyard farmers.
Final Thoughts…
Patrick, you’ve already taken a great step by recognizing the importance of not letting your hard-earned harvest go to waste. Freezing your produce is a simple yet effective way to prolong its life and preserve those vibrant flavors for months to come. Remember, the key is in the preparation—wash, blanch, flash-freeze where necessary, and always use airtight packaging to protect against freezer burn. Thank you for sharing your situation, and may your freezer soon be filled with the fruits of your labor. Keep up that enthusiasm, and enjoy your coming culinary creations!
