See All: Backyard Farming
Free Backyard Farming Webinar…
You can grow food! This free webinar is for people who want the fastest and easiest ways to produce healthy and delicious vegetables, eggs, and meat. Because you know that growing your own food is like printing your own money…
Click Here To Watch The Free Webinar Now!
“I’ve successfully grown potatoes for the first time in my backyard garden in Alberta, Canada. The plants are lush and green, but I’m unsure when to harvest them and how to store them so they last through the winter. Could you provide a detailed guide to help me out? I also noticed some plants are turning yellow earlier than others and want to know if that’s normal. I’d love to get the most out of my harvest, so any advice you have would be greatly appreciated!” thanks, Peter, Edmonton, Canada.
Congratulations on your successful potato crop, Peter! Harvesting and storing potatoes is a truly satisfying process, but it does require some careful attention if you want to keep them fresh and mighty tasty through the cold Alberta winters. Let’s walk through every aspect of harvesting and storing your potatoes so you’ll be well-prepared when the time comes.
When to Harvest Potatoes
First off, knowing when to harvest your potatoes is one of the most important steps. Since you’re in Edmonton, you’ll need to pay attention to a couple of key signals from the plants and the weather.
Maturity of the Potato Plant
Potatoes generally take anywhere from 70 to 120 days to mature, depending on whether you’ve grown an early, mid, or late-season variety. For the most part, you’ll be able to harvest new potatoes about two to three weeks after the plants have finished flowering. However, for full-sized potatoes (the kind you want to store), the leaves and stems need to die back naturally.
If you notice your plants starting to turn yellow and the foliage withering, that’s usually a sign the potatoes are maturing beneath the soil. Given your note that some plants are turning yellow earlier than others, it’s likely those plants have matured faster and are closer to being ready for harvest.
Checking Before You Harvest
The timing of your harvest can significantly affect the quality and storage life of your potatoes. Here’s how to make sure they’re ready to dig up:
- Test Dig: About a week after the plants start yellowing, gently dig around a plant with your hands or a spade at the edge of the hill. Pull out a few potatoes and rub the skin with your thumb.
- Skin Toughness: If the skin slips off easily, the potatoes are still immature and need to stay in the ground longer. Wait another week or two and check again.
- Weather Watch: Harvest on a dry day so the moist soil won’t cling to your potatoes, making them harder to cure. This also helps reduce the risk of disease.
You’re usually aiming to harvest before the first heavy frost in the fall. Since you’re in Alberta, keeping an eye on the long-term weather forecast will be particularly important as the temperatures can drop quickly.
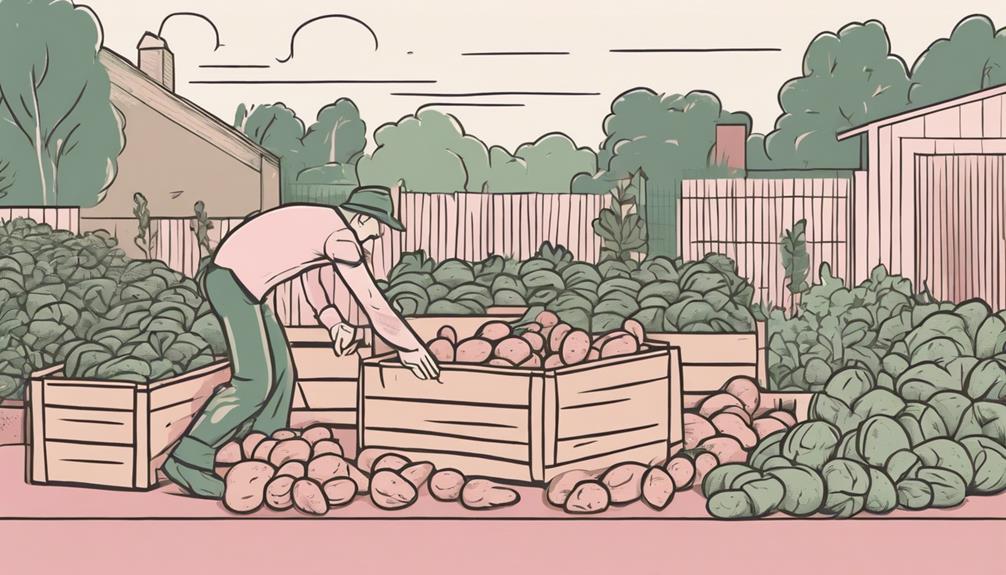
How to Harvest Potatoes
Now that you know when to harvest your potatoes, let’s talk about how to do it without damaging your crop.
Tools Needed for Harvesting
- Garden Fork or Spade: For loosening the soil around the plants.
- Gloves: To protect your hands while working.
- Buckets or Baskets: To collect your harvest.
It’s best to use a garden fork or spade rather than a sharp shovel, which can slice through potatoes accidentally.
Step-by-Step Harvesting Process
- Loosen the Soil: Insert your garden fork or spade about 12-18 inches from the base of the plant to loosen the soil. Be gentle to avoid cutting into the potatoes.
- Lifting the Plants: Lift the plant slowly by the stem, and the potatoes will come up along with it. Alternatively, dig around the outer edges and lift from underneath.
- Collect the Potatoes: Carefully pick the potatoes from the plant. Try not to bruise them or break their skins as damaged potatoes won’t store well.
- Check Your Soil: After removing the main bulk of the potatoes, sift through the soil with your hands or fork to find any stragglers. Leaving a stray potato can lead to unwanted pests in your garden next season.
- Dry Post-Harvest: Lay the potatoes on the soil surface or on a mat for an hour or so to allow them to dry and harden slightly. Only keep those that are firm and unblemished for storage.
How to Cure Potatoes Properly
Once you’ve harvested your potatoes, the next thing to do is cure them. Curing allows the skin to toughen up, which helps protect the potatoes during storage. Peter, this step is especially important for long-term storage, so you’ll want to get it just right. Here’s how to go about it:
What You’ll Need
- An area that’s dark, well-ventilated, and has temperatures around 10-15°C (50-59°F).
- Some breathable material like burlap sacks or paper to cover the potatoes.
- A few days to two weeks of patience.
Curing Process
- Drying: After you’ve laid your potatoes out to dry after harvesting, move them to your designated curing area. Avoid washing them as excess moisture can encourage rot.
- Arranging: Spread the potatoes in a single layer, ensuring they’re not piled on top of one another. A single layer allows air to circulate well.
- Covering: If the area isn’t very dark or cool, cover the potatoes with burlap or heavy paper. This minimizes unwanted exposure to light and reduces the chances of sprouting or greening.
- Monitoring: Keep them curing for about 10-14 days, checking periodically for any signs of decay.
Once cured, your potatoes will have tougher skins and should be less prone to rot or damage during those long winter months. Curing can seem like an extra step, but it’s well worth it if you want your spuds to last for months.
How to Store Potatoes for Long-Term
Now that your potatoes are cured, it’s time to arrange them for long-term storage. Alberta winters can be intense, so proper storage conditions are vital to prevent your hard work from going to waste.
Ideal Storage Conditions
Here’s a quick guide to the ideal conditions for storing potatoes long-term:
| Condition | Recommendation |
|---|---|
| Temperature | About 4-7°C (39-45°F). Colder than this and the potatoes will convert starches to sugars, giving them a sweet but undesirable flavor. |
| Humidity | High humidity, ideally between 85-95%. If it’s too dry, the potatoes will shrivel, but too wet and they could rot. |
| Light Levels | Darkness is best. Exposure to light causes potatoes to turn green and produce solanine, a bitter-tasting, toxic compound. |
Best Storage Spots
Finding the right storage space can be a challenge, especially if you don’t have a traditional root cellar. However, there are a few alternative options:
- Basement or Cold Room: If you have a cooler basement or a pantry area that maintains a consistent temperature and humidity, this is a great place to store your potatoes.
- Garage: Some people use their garage, but ensure it’s insulated enough to maintain the necessary temperatures.
- Outdoor Storage: In milder climates or during fall, a shaded, outdoor bin covered with straw for insulation might be an option, though it’s not the best choice for long-term storage during Alberta’s harsher winters.
- Fridge Compartment: Not the best long-term option due to the colder temperature, but in a pinch, a fridge crisper could temporarily store a small amount.
Packaging and Arrangement for Storage
- Avoid Plastic: Store potatoes in breathable containers like a wooden crate, mesh bag, or cardboard box lined with paper. Plastic traps moisture, increasing the chances of rot.
- Layering: Layer the potatoes with paper or straw if placing them in deeper containers. This helps maintain consistent humidity and airflow.
- Keep Checks: Inspect your potatoes every couple of weeks and remove any that show signs of spoilage. Just one rotten potato can quickly spoil the entire batch.
- Don’t Store Near Other Produce: Keep them away from onions and apples, as these produce gases that can cause potatoes to spoil quicker.
Troubleshooting Potato Storage Problems
Even with the best efforts, sometimes issues arise during storage. Here are some troubleshooting tips in case things don’t go exactly to plan, Peter:
Potatoes Turning Green
If you find some of your potatoes are turning green, it’s likely due to light exposure. While small green spots can be cut out, severely green potatoes should be discarded as they contain high levels of solanine, which is mildly toxic.
Solution:
- Keep potatoes completely in the dark by covering storage containers with a thick cloth or keeping them in a dark space.
- Make sure storage areas are not located near any bright lights, and ensure lid or cover options are secure.
Sprouting Potatoes
This typically occurs when they are stored in an area that’s too warm or there’s some light exposure.
Solution:
- Reduce storage temperature slightly.
- Remove any noticeable sprouts immediately to lengthen the shelf life of your potatoes.
Poor Texture or Sweet Taste
If your potatoes end up with a sweet taste or an unappealing texture when cooked, this is often a sign that they’ve been stored in an area that’s too cold (below 4°C or about 39°F).
Solution:
- Ensure your storage area is warmer, ideally between 4-7°C (39-45°F).
- “Warm” the potatoes gradually for a few days at a higher temperature (15-20°C / 59-68°F) before cooking. This can help reduce the sweetness.
Rotten Potatoes
Rot might occur due to too much moisture or poor ventilation in the storage area.
Solution:
- Increase ventilation or reduce humidity. Space out potatoes more if they are too tightly packed together.
- Inspect potatoes more frequently and discard any affected ones immediately before they spoil others.
- If a pattern of rot develops, adjust the environment or switch to a different storage area if possible.
Final Thoughts…
Peter, thank you for reaching out with your question! Navigating the journey from harvesting to storage for potatoes can feel daunting the first time around, but with these steps, you’re well on your way to preserving an abundant harvest. Remember that the key to success lies in understanding your particular storage environment and making small adjustments as necessary. Enjoy your freshly harvested potatoes all winter long, and keep me posted on how it goes!
Return To: Backyard Farming
Free Backyard Farming Webinar…
Marjory Wildcraft: For 20+ years, Marjory has been a leader in survival & preparedness and wants to show you how to grow food in your backyard farm. This free webinar is for people who want the fastest and easiest ways to produce healthy and delicious vegetables, eggs, and meat. Because you know that growing your own food is like printing your own money…
