How To Become More Self-Sufficient Without Starting a Full-Blown Farm…
Want to start preserving your harvest, making your own soap, or building a backyard root cellar — but not sure where to begin? “Homesteading Advice” gives you instant lifetime access to 35+ practical homesteading books on food preservation, veggie gardening, DIY natural cleaning products (save over $250 per year with this skill alone), brewing, off-grid energy, and a whole lot more…
Click Here To Check It Out Now!
“I started growing winter squash in my backyard in Boston, but I’m unsure when it’s the right time to harvest them. They seem big enough, but I don’t want to pick them too early or too late. Also, I’m wondering how I should store them so they don’t go bad. Can you guide me through the steps?” Thanks, Nancy, Boston, USA.
How Do I Harvest And Store Winter Squash?
Growing winter squash in your backyard can be incredibly rewarding, but knowing exactly when to harvest and how to store them can make all the difference in preserving their flavor and longevity. Let’s walk through the entire process so you can ensure that your squash are harvested at the perfect time, and stored in a way that they’ll last you well through the winter months.
When to Harvest Winter Squash
One of the most important aspects of winter squash is timing the harvest just right. Picking them too early can result in squash that doesn’t fully develop its sweetness and can spoil quickly. Waiting too long, on the other hand, could mean they start to deteriorate in the garden. Nancy, let’s break down the signs to look for to ensure you pick your squash at the ideal time.
Check the Days to Maturity
All winter squash varieties have a specific number of days they take to reach maturity. This information is usually provided on the seed packet when you first planted them. For example, many varieties will range between 85 to 110 days. While this isn’t a hard and fast rule, it gives you a good idea of when to start paying close attention to the other signals of ripeness.
Examine the Color
Perhaps the easiest way to tell if your winter squash is ready to harvest is by looking at its color. When the squash has reached its mature color—whether that’s a deep orange for pumpkins or a rich green for acorn squash—it’s time to consider harvesting them.
Keep in mind that the exact shade will vary depending on the type of squash you’re growing. But as a rule of thumb, if the color is vibrant and consistent all over, that’s a strong indicator of ripeness.
Check the Skin Toughness
The skin of mature winter squash should be quite hard. A good test is to press your fingernail into the skin; if it resists indentation, the squash is probably ready to pick. This toughened skin is crucial for the long storage life of winter squash, protecting it from various pests and prolonging its edible life.
Look at the Stem
Another critical sign is the condition of the stem. A ready-to-harvest winter squash will have a dry, brown, and possibly cork-like stem. If the stem is still green and tender, then the squash needs more time on the vine. A dry, brittle stem also makes the squash easier to detach without causing damage, which leads us to the next point.
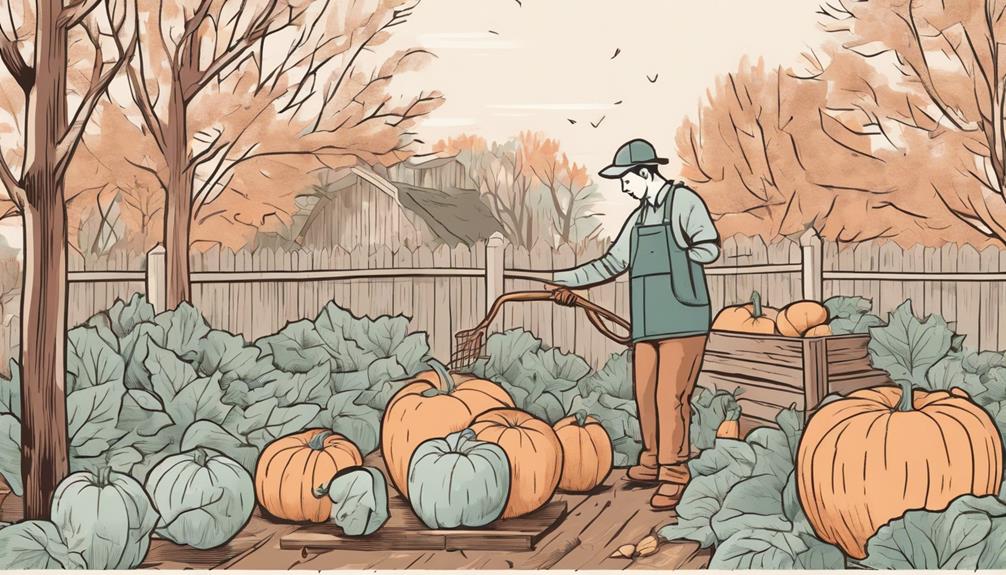
How to Harvest Winter Squash
Nancy, once you’ve determined that your squash is ready to be harvested, it’s essential to follow the right steps to ensure you don’t accidentally damage your produce. Damaged squash is more prone to pests, rot, and an overall shorter storage life, so careful handling is key.
Tools You’ll Need
- Garden shears or a sharp knife
- Gloves (optional for added grip and protection)
Steps to Harvest
- Choose a dry day: Harvesting squash in dry conditions minimizes the risk of mold and rot as moisture can seep into the squash through the cut stem.
- Cut the squash from the vine: Use garden shears or a sharp knife to cut the stem about 2 to 4 inches above the squash. Leaving a bit of stem is vital as it helps seal the squash, reducing the risk of dehydration and pest invasion.
- Handle with care: Don’t carry squash by the stem as it might break off, leaving the squash exposed to potential damage. Cradling it from beneath provides better support and reduces the risk of dropping it.
- Check for damage: As you harvest each squash, do a quick inspection for any soft spots or cracks. Damaged squash should be used as soon as possible, as it won’t store well.
Curing Squash for Storage
Before you consider storage, there’s an important step called “curing” that most winter squash varieties benefit from. Curing helps to harden the skin even further, reducing the chance of rot during storage.
- Choose a sunny, warm spot: Place your harvested squash in a sunny location where the temperature stays between 80 to 85°F. A porch, a sunny window, or even the garden are suitable options.
- Allow to cure for 1 to 2 weeks: Leave the squash in this position for around 10 to 14 days. During this time, keep an eye on the weather—if rain or cold temperatures are in the forecast, bring the squash indoors to a dry and warm area.
- Rotate squash every few days: This ensures even exposure and further helps any unequally ripened areas to catch up.
How to Store Winter Squash
Once you’ve cured your winter squash, proper storage is the next critical step. With the right conditions, your squash can last anywhere from two to six months, providing your family with homegrown produce well into the winter.
Ideal Storage Conditions
Winter squash likes to be stored in a cool, dark, and dry environment. The optimal storage conditions typically include:
- Temperature: Between 50 to 55°F is ideal. Warmer temperatures may shorten the storage time, while colder conditions can lead to chilling injuries, which appear as soft spots and make the squash more susceptible to rot.
- Humidity: A relative humidity of about 60-70% is perfect. Too much moisture can cause mold, while too little can dry the squash out.
- Ventilation: Good air circulation is crucial to prevent stale conditions that can encourage rot. Consider storing your squash on shelves, in baskets, or spread out on a pallet, ensuring they don’t touch each other to allow air to flow freely.
Storage Locations
Depending on where you live, you may have a few different indoor options for storing squash:
- Basement: Basements are often naturally cool and dark, making them an ideal spot if they are not too humid.
- Garage: A garage works well as long as it doesn’t dip below freezing in the winter months. Just make sure it’s insulated and free from pests.
- Pantry or Spare Room: If you have a cooler pantry or spare room in your home, this can work well for storage too. Just avoid placing the squash against exterior walls that may be too cold.
- Root cellars: Traditional root cellars were designed for storing crops like squash through the winter. If you’re lucky enough to have one, it likely offers ideal conditions.
Checking Squash During Storage
It’s essential to regularly check your stored squash throughout its storage period. Every few weeks, examine each squash for any signs of soft spots, wrinkles, or mold. If you find any showing signs of spoilage, remove those right away to prevent the issues from spreading to the others.
Nancy, keeping a closer eye on your squash will allow you to use any that are starting to go bad before they’re too far gone, helping minimize waste.
Common Challenges and Troubleshooting
Mold on Stored Squash
If you find mold forming on your squash, it often indicates the environment is too humid or the air circulation is poor. Consider moving the squash to a drier location and ensuring there is adequate ventilation. Mold can also be surface mold, particularly at the sites of small superficial scratches—lightly sanding or washing with a mild bleach solution might help salvage the squash, though it should be used sooner rather than later.
Shriveled or Dehydrated Squash
If your squash starts to look shriveled, it could indicate that the storage area is too dry or too warm. You may need to raise the humidity slightly or choose a cooler location. Once shriveled, the texture can be compromised and may not be suitable for longer storage; plan to use those squash soon.
Chilling Injury
If you notice your squash developing sunken, watery areas, this could be a sign of chilling injury—common if the squash were exposed to temperatures below 50°F for an extended time. Unfortunately, squash with chilling injuries won’t store well and should be used immediately.
Pests
Pests can wreak havoc on your winter squash, especially in a more vulnerable storage environment like a garage or an uninsulated shed. Make sure to regularly inspect your storage area for signs of pests like rodents or insects. Elevating your squash off the ground, using metal shelving, and keeping the area clean can help deter pests.
Using Stored Winter Squash
Your stored squash can be used in countless delicious recipes, and it’s vital to be creative to ensure none goes to waste. Here are a few ideas to help you make the most of your hard-earned harvest:
- Roasting and Pureeing: Roast your squash in the oven for a delicious side dish or puree it to make soups, pies, or sauces.
- Baking: Many winter squash types, like butternut and kabocha, make excellent additions to baked dishes, adding sweetness and a creamy texture.
- Freezing: If you find yourself with more squash than you can use before it turns, consider blanching and freezing the puree or chunks to use later on in the year.
Types of Winter Squash and Their Storage Life
Different types of winter squash have varying storage capabilities. Here’s a quick breakdown of some common varieties and how long they’re likely to last under optimal conditions:
| Type of Squash | Description | Approximate Storage Duration |
|---|---|---|
| Pumpkin | Large and round, typically orange with a slightly sweet flesh. | 2 to 3 Months |
| Butternut Squash | Beige-colored with a sweet, nutty flavor. Great for roasting and soups. | 3 to 6 Months |
| Acorn Squash | Small, acorn-shaped with deep green skin and a slightly sweet taste. | 1 to 2 Months |
| Kabocha Squash | A Japanese variety, dark green with a dense, sweet interior. | 3 to 4 Months |
| Spaghetti Squash | Oblong, pale-yellow. When cooked, flesh pulls apart into spaghetti-like strands. | 1 to 2 Months |
Note:
The storage duration can vary slightly depending on your local conditions, the specific variety you grew, and how well the squash were cured and stored. Always keep an eye on your stash and adjust your plans accordingly.
Final Thoughts…
Nancy, thank you for asking such a great question, as harvesting and storing winter squash can be a wonderful way to extend your gardening efforts right into the kitchen. By paying attention to the signs of ripeness, handling your squash carefully during harvest, and storing them in just the right conditions, you’re set to enjoy the fruits of your labor for months to come. Happy gardening!
