How To Become More Self-Sufficient Without Starting a Full-Blown Farm…
Want to start preserving your harvest, making your own soap, or building a backyard root cellar — but not sure where to begin? “Homesteading Advice” gives you instant lifetime access to 35+ practical homesteading books on food preservation, veggie gardening, DIY natural cleaning products (save over $250 per year with this skill alone), brewing, off-grid energy, and a whole lot more…
Click Here To Check It Out Now!
“I’ve recently started a backyard farm in my home in Bend, Oregon, and I’m really interested in creating my own organic compost to help my garden thrive. I’ve gathered up kitchen scraps, leaves, and grass clippings, but I’m not quite sure what to do next. How do I make sure my compost is truly organic and effective? I’ve also heard that it’s easy to mess things up and end up with smelly, useless compost. How can I avoid that?” thanks, Melissa, Bend, Oregon, USA.
How Do I Make Organic Compost?
Welcome to the wonderful world of organic composting, Melissa! It’s great that you’re taking this step to nurture your backyard farm. Creating your own organic compost is one of the most rewarding and sustainable practices you can incorporate into your gardening routine. Not only does compost contribute to soil health, but it also helps to recycle waste, reduce your environmental impact, and can save you money on fertilizers.
But I understand why you might feel a bit cautious. Composting can seem like a daunting process, especially when you’re concerned about getting things right. So let’s walk through the process step by step, and I’ll give you some tips along the way to help ensure your compost turns out rich, healthy, and perfectly organic.
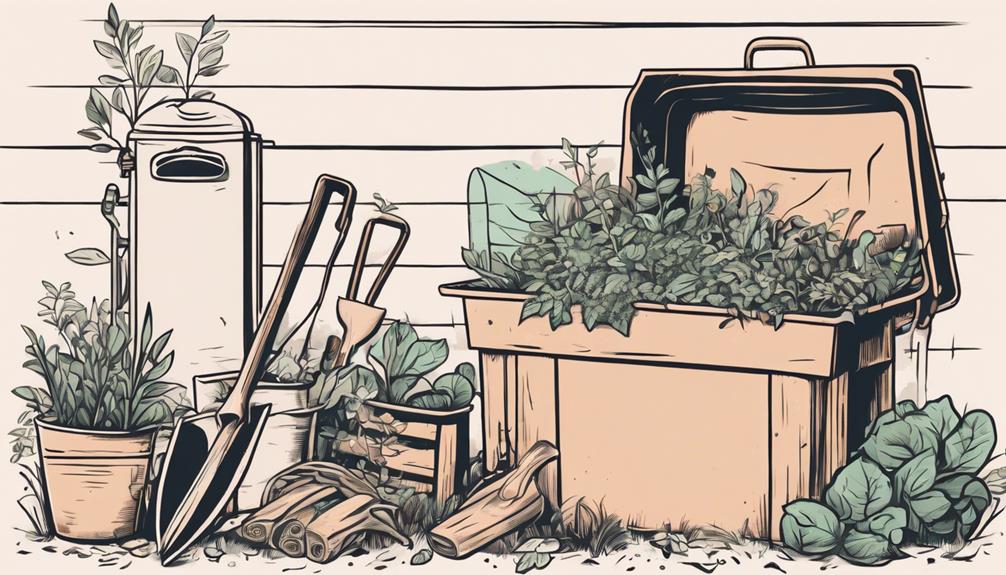
What Exactly Is Organic Compost?
Organic compost is decomposed organic matter that you can add to your soil to enrich it. The “organic” part means that all the materials used in the compost are natural and have not been treated with synthetic chemicals, fertilizers, or pesticides. When managed properly, organic compost can greatly improve your soil’s structure, moisture retention, and provide essential nutrients to your plants.
By focusing on organic composting, you’re ensuring that what goes into your soil is completely free from harmful chemicals, and in turn, the food you grow will be healthier and safer to eat.
Starting with the Right Ingredients
The foundation of any good compost pile is the materials you use. These are broken down into two categories: browns and greens.
- Browns: These are carbon-rich materials. Examples include dried leaves, straw, wood chips, cardboard, and paper. They help provide structure to your compost and encourage aeration.
- Greens: Greens are nitrogen-rich materials. These include kitchen scraps like vegetable peels, coffee grounds, grass clippings, and even manure from herbivores (such as rabbits or chickens). They deliver essential nutrients that fuel the decomposition process.
You’ll want a mix of about 3 parts brown material for every 1 part green material. This balance provides the best conditions for decomposition and helps you avoid a smelly, slimy compost pile.
Setting Up Your Compost Pile
With your materials gathered, it’s time to set up your compost pile. Whether you’re using a compost bin or an open pile, here’s how to do it:
Location, Location, Location
The spot you choose for your compost pile or bin is crucial, Melissa. You’ll need a location that’s convenient for you to access regularly but also has good drainage and remains relatively shady. Compost needs to maintain a certain moisture level: too much sun can dry it out, while too much water can make it soggy.
Layering Method
Start by spreading a layer of coarse browns at the bottom of your compost bin or pile to aid in drainage and airflow. On top of that, add a layer of greens, like your kitchen scraps and grass clippings. Then, add another layer of browns. Keep alternating layers like this, ensuring each layer is roughly 2-4 inches thick.
Later on, as you add more material, you can mix these layers together. But initially, layering helps to minimize odors and speeds up the composting process.
Maintaining Your Compost
Once you’ve set up your compost pile, the key to turning your organic materials into rich compost is proper maintenance.
Turning You Compost
Compost needs plenty of oxygen to decompose properly, which is why you’ll need to turn or aerate your pile regularly. Use a pitchfork or shovel to mix the layers about once every 1-2 weeks. This introduces oxygen and helps break down the materials faster.
If you notice any odor (beyond a mildly earthy smell), it usually means your pile needs more oxygen. Turn it more frequently to correct this.
Moisture Control
The moisture level in your compost is also essential, Melissa. Compost should be damp, like a wrung-out sponge. If it’s too dry, decomposition will slow down. If it’s too wet, you risk turning your compost into a smelly, anaerobic mess.
During dry seasons, you may need to sprinkle water on your compost pile to keep it moist. Conversely, cover your pile during heavy rains to avoid waterlogging. Keeping an eye on the moisture level is a simple but effective way to ensure everything stays on track.
Size Matters
The size of your compost pile or bin also impacts how quickly materials decompose. A pile that’s too small may struggle to retain the heat needed for decomposition, while a pile that’s too large can become difficult to manage.
A good rule of thumb is to aim for a compost pile that’s at least 3 feet by 3 feet by 3 feet. This size is manageable for backyard farming but still large enough to generate and maintain the heat needed for quick decomposition.
Common Composting Challenges and How to Overcome Them
Even with the best of intentions, composting can present some challenges. Here’s how to troubleshoot common issues you might encounter, Melissa:
Odor Problems
One of the most common concerns people have about composting is bad smells. If your compost has an unpleasant odor, it’s usually due to a lack of oxygen, too much moisture, or an imbalance between greens and browns.
- Lack of Oxygen: This can cause your pile to become anaerobic (without oxygen), resulting in a rotten egg smell. Turn your pile more regularly to introduce oxygen.
- Too Wet: If your compost becomes waterlogged, it can also create an anaerobic environment. Add more browns to soak up excess moisture, and cover your pile during rain.
- Imbalance: Too many greens and not enough browns can lead to a slimy, foul-smelling pile. Always aim for that 3:1 brown-to-green ratio.
Slow Decomposition
If your compost seems to be taking forever to break down, there are a few possible culprits:
- Not Enough Greens: Greens provide the nitrogen needed for rapid decomposition. Ensure you have the right balance by adding more kitchen scraps or grass clippings.
- Pile Is Too Small: Smaller piles struggle to maintain heat, which slows decomposition. Consider adding more material to bulk up your pile.
- Lack of Moisture: Dry compost won’t decompose quickly. Add water if your compost feels dry.
Pests and Critters
Another concern people often have is attracting unwanted critters to the compost pile, such as rodents or raccoons. Keeping your compost mixed, covered, and balanced between browns and greens should minimize these issues.
- Avoid adding: Meat, dairy, and oily foods.
- Cover food scraps: Use a good layer of browns to cover food scraps to keep pests at bay.
- Secure your bin: Use a compost bin with a tight-fitting lid if you frequently have problems with pests.
Also, note that some critters, like worms and beneficial insects, are actually welcome in your compost pile! They help break things down and speed up the composting process.
Knowing When Your Compost Is Ready
You’ll know your compost is ready when the materials have broken down into a dark, crumbly substance that has an earthy smell. This process can take anywhere from a few months to a year, depending on the conditions and how well you maintain your pile.
Melissa, you might be impatient to use your compost, but give it time to mature fully. Immature compost can still contain materials that haven’t broken down and can harm your plants. Instead, be patient, and understand that each season will get faster as you refine your composting system and methods.
Tips to Speed Up the Composting Process
If you’re eager to get your compost ready quicker, here are a few tips:
- Shred before adding: Break down materials like leaves, paper, and stems into smaller pieces before adding them to the pile. This increases surface area, allowing microorganisms to work faster.
- Turn more frequently: Linking back to the importance of oxygen, turning your pile every week instead of every couple of weeks can speed things up considerably.
- Add some activators: Manures or even finished compost can help introduce more microbes and jump-start the process.
Climatic Considerations
Since you live in Bend, Melissa, you’ll need to account for the local climate when composting. Bend has a semi-arid climate, which means it can get dry and cold, especially in the winter. To keep your compost going year-round, here’s what to keep in mind:
Winter Composting
Composting can slow down significantly in cold weather, but you can take steps to keep it going:
- Insulate your compost: Pile up leaves or straw around and over your compost bin to keep the heat in and cold out.
- Add greens: During winter, greens might be harder to come by. Consider stockpiling in advance or look for alternatives like coffee grounds, which are often abundant.
Summer Composting
In the hotter summer months, your compost is at risk of drying out:
- Keep it moist: Turn your compost more regularly to check moisture levels and add water as needed.
- Provide shade: Consider using shade cloth or moving the compost bin to a shaded area to prevent it from drying out under the hot sun.
Alternative Approaches to Standard Composting
While the traditional pile method is a great starting point, you might eventually explore other composting methods, depending on the space, time, and effort you want to invest.
Vermicomposting
Vermicomposting uses worms to break down organic matter quickly into rich, fine compost, also known as worm castings. This method involves setting up a bin with bedding like shredded paper or coconut coir and then adding both worms and food scraps. Worms thrive on a steady diet of greens and can turn them into compost much faster than traditional methods.
For a backyard farm, vermicomposting could be a great option if you’re tight on space and want to produce high-quality compost in smaller quantities.
Compost Tumblers
If you’re concerned about turning your compost regularly, a compost tumbler might be worth considering. These enclosed bins are designed to turn easily, making aerating your compost as simple as giving the tumbler a spin every few days. They’re efficient and great for keeping pests out too. However, you might find that they have a relatively small capacity compared to a traditional pile.
Trench Composting
If you don’t want to manage a compost pile or bin, another method is trench composting. This involves digging a trench or series of holes in your garden and directly placing your kitchen scraps and other compostable materials in them. Cover the trench with soil, and nature will take care of the rest. This method is ideal for gradually enriching your soil over time and requires very little maintenance.
Best Uses for Your Finished Compost
Once your compost is ready, there are endless ways you can use it to benefit your backyard farm. Here are a few of the most common:
- Soil Amendment: Mix your compost directly into your garden soil a few weeks before planting. This enriches the soil with nutrients and helps with water retention.
- Mulch: Apply a few inches of compost on top of the soil around plants as mulch. It helps suppress weeds and retains moisture while eventually seeping into the soil and enriching it.
- Compost Tea: Soak finished compost in water for several days to create a nutrient-rich compost tea that you can use to water your plants, effectively fertilizing them at the same time.
- Seed Starting: Sift your compost through a fine screen to remove larger chunks, and use the finer material as a seed-starting mix.
Final Thoughts…
Melissa, you’re on the right track by wanting to make your own organic compost for your backyard farm. By following the steps outlined, balancing your greens and browns, and paying attention to moisture and aeration, you’ll be on your way to creating black gold for your garden. Don’t be afraid to get hands-on and make adjustments as you monitor the process. Composting is a natural part of gardening that connects you even more with the cycle of life in your garden, and the rewards are certainly worth it.
Don’t rush the process, and remember, great compost does take some time. Thanks for reaching out with such a thoughtful question, and happy composting!
