How To Become More Self-Sufficient Without Starting a Full-Blown Farm…
Want to start preserving your harvest, making your own soap, or building a backyard root cellar — but not sure where to begin? “Homesteading Advice” gives you instant lifetime access to 35+ practical homesteading books on food preservation, veggie gardening, DIY natural cleaning products (save over $250 per year with this skill alone), brewing, off-grid energy, and a whole lot more…
Click Here To Check It Out Now!
“Hi, I’ve recently started a backyard farm in southern California and have been growing a variety of herbs, including lavender, chamomile, and peppermint, for medicinal purposes. I’m at the stage where I need to harvest them, but I’m unsure about the best way to store them while retaining their medicinal properties. Could you provide detailed steps on how to properly store harvested herbs for medicinal use, including any specific tips for the types of herbs I’m growing? Thanks so much!”
When it comes to storing harvested herbs for medicinal use, the process is quite nuanced. The way you harvest, dry, store, and handle these herbs will directly impact the potency and effectiveness of their medicinal properties. Whether you are working with lavender, chamomile, peppermint, or any other medicinal herb, following the right steps is crucial.
Why Proper Storage of Medicinal Herbs Is Important
The effectiveness of medicinal herbs depends largely on the volatile oils and active compounds they contain. These oils can deteriorate over time due to exposure to light, air, moisture, and improper temperatures, leading to a loss of potency. Proper storage ensures that the herbs retain their medicinal properties until you’re ready to use them.
Patricia, understanding the details surrounding the storage process will set you up for success with your backyard farm. Let’s walk through the key steps in storing your harvested herbs to maintain their medicinal properties.
When to Harvest Your Medicinal Herbs
Timing is everything when it comes to harvesting medicinal herbs. Most herbs are at their peak potency early in the morning just after the dew has evaporated but before the sun removes essential oils. Harvesting at this time will ensure maximum potency.
Best Harvesting Times for Some Common Herbs:
- Lavender: Harvest when about one-third of the buds have opened, usually during early to mid-morning.
- Chamomile: Pick the flowers when they are fully open and free from dew, usually sometime in the morning.
- Peppermint: Harvest the leaves when they are mature but before the plant starts to flower for the highest concentration of essential oils.
By following these timing suggestions, you’ll start on the right foot with the most potent herbs possible.
How to Harvest and Prepare Herbs for Storage
Harvesting and preparing herbs for storage requires attention to detail to ensure their medicinal properties are preserved.
Step 1: Use Clean and Sharp Tools
Always use clean, sharp scissors or pruning shears to cut the herbs. Dull blades can crush the stems and leaves, which can lead to loss of essential oils and increase the likelihood of contamination.
Step 2: Harvest Only Healthy Plants
It’s crucial to select healthy plants for harvesting. Avoid any leaves or stems that show signs of disease or insect damage, as these might introduce unwanted contaminants when storing the herbs.
Step 3: Handle with Care
After cutting, be gentle with the harvested herbs. Rough handling can bruise the plant material, leading to a loss of valuable oils. Place them in a basket or paper bag immediately upon harvesting to prevent exposure to sunlight, which can deplete their medicinal qualities.
Drying Herbs for Medicinal Use
Drying your herbs is one of the most crucial steps in preserving their medicinal benefits. Proper drying prevents microbial growth and ensures the herbs last through storage while retaining their potency.
Air Drying
Air drying is one of the most traditional and easiest ways to preserve herbs. This method is particularly suited for herbs like lavender and peppermint.
- Bundle Small Groups: Gather small bundles of the herbs (5 to 10 stems for larger leaves, up to 20 for smaller ones) and tie them together at the base. Hanging the bundles upside down in a warm, dry, and well-ventilated space away from direct sunlight is key.
- Monitor for Dryness: Depending on the humidity in your area, herbs usually take 1 to 2 weeks to dry completely. You’ll know they’re ready when the leaves crumble easily between your fingers.
Using a Dehydrator
If you live in a more humid climate, or if you’re dealing with thick leaves, a dehydrator might offer a better alternative for drying your medicinal herbs.
- Preheat the Dehydrator: Set the dehydrator to a low temperature between 95-115°F (35-46°C), which is sufficient to dry the herbs without destroying the essential oils.
- Arrange Your Herbs: Place the herbs on the dehydrator’s trays in a single layer, ensuring they don’t overlap to allow sufficient airflow.
- Drying Time: Most herbs will be dry within 1 to 4 hours, but thicker leaves might take slightly longer. Check regularly to avoid over-drying.
Storing Dried Herbs
Once your herbs are dry, the next step is storing them properly to maintain their medicinal qualities. Even after drying, herbs can lose potency if exposed to the wrong storage environment.
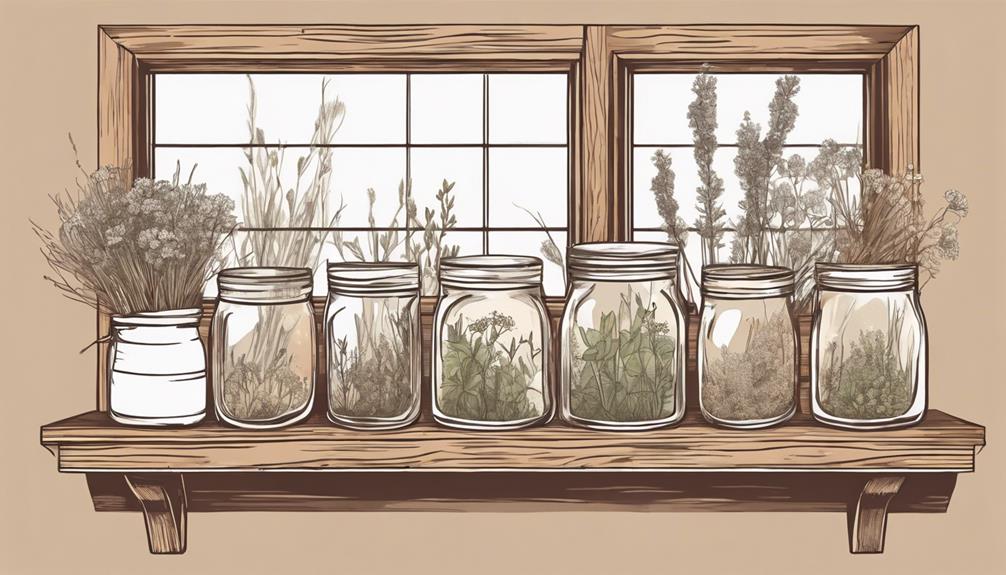
Selecting the Right Containers
Your choice of storage container plays a pivotal role in how long your herbs will retain their medicinal properties.
- Glass Jars: Opaque glass jars with airtight lids are ideal, as they protect herbs from light, air, and moisture. Mason jars or tinted glass jars work well.
- Metal Containers: Metal tins with tight-fitting lids can also be used but ensure they’re non-reactive to avoid any chemical interaction with the herbs.
- Avoid Plastic: Plastic containers aren’t ideal as they can sometimes absorb and contaminate the volatile oils within the herbs.
Labeling Your Containers
Each storage container should be labeled accurately with the herb name and harvest date. This helps you keep track of the age of your herbs, ensuring that you use them within their potency window.
Ideal Storage Conditions
Once placed in suitable containers, store your herbs in a cool, dark, and dry place. A pantry or cupboard away from any heat sources, sunlight, or moisture is ideal.
Troubleshooting Common Storage Issues
Even with careful handling, sometimes things don’t go as planned. Below are some common storage issues and tips on how to troubleshoot them:
- Mold Growth: If your dried herbs develop mold, they weren’t fully dried before storage or have been exposed to moisture. Dispose of moldy herbs immediately to avoid health risks. To prevent this, ensure your herbs are thoroughly dry before storing, and consider adding a desiccant packet inside the container.
- Loss of Aroma or Potency: Herbs that lose their scent or flavor may have been exposed to air, light, or too much heat. Always store herbs in dark, airtight containers in a cool place to mitigate this risk.
- Insects or Bugs: If you find pests in your stored herbs, it’s best to discard the affected batch. To prevent infestations, freeze dried herbs for 48 hours before storing them, which kills off any insect eggs or larvae.
Longevity of Stored Medicinal Herbs
While well-stored herbs can last a considerable amount of time, their medicinal quality eventually declines. Typically, herbs retain their medicinal qualities for 6 months to a year under ideal storage conditions.
How to Know When Herbs Have Lost Their Potency
Perform a “sniff test” to check the potency of your herbs. If the aroma is faint or non-existent, the herb has likely lost much of its medicinal strength. Also, if the dried leaves crumble to dust with a slight touch, they might be past their prime.
Herbs That Store Well for Longer Periods
Some herbs have a longer shelf life than others, depending on the resilience of their oils and compounds. Patricia, given the herbs you’re growing, here’s what you can expect:
- Lavender: Can retain its effectiveness for up to one year if stored properly.
- Chamomile: Typically retains good potency for around six months to a year.
- Peppermint: Like lavender, peppermint can stay potent for up to a year with correct storage conditions.
Using Your Stored Medicinal Herbs
When you’re ready to use the herbs, grind only the amount you need at that time. Crushing or grinding herbs releases their volatile oils, which start to deteriorate once exposed to air. Keeping the herbs in their whole form until use is another way to ensure maximum potency.
Applications of Stored Medicinal Herbs
Stored herbs can be used in a variety of medicinal formats, including:
- Teas and Infusions: Brewing dried herbs into teas is one of the simplest ways to use them medicinally. Chamomile tea, for example, is well-known for its calming effects.
- Tinctures: These are alcohol-based extracts that store well and can preserve the herbs’ medicinal properties for years.
- Salves and Balms: Some dried herbs, like lavender, can be infused in oils and made into balms for topical application.
A Quick Table for Reference
Here’s a handy table for you to reference the ideal stand-alone conditions and general longevity of your harvested herbs:
| Herb | Ideal Drying Method | Estimated Longevity | Optimal Storage Conditions |
|---|---|---|---|
| Lavender | Air Drying | Up to 1 year | Tinted Glass Jar, Cool, Dark Place |
| Chamomile | Dehydrator | 6 months – 1 year | Opaque Glass Jar, Cool, Dark, Dry Place |
| Peppermint | Air Drying | Up to 1 year | Opaque Metal Tin or Glass, Cool, Dark Place |
Final Thoughts…
Patricia, I want to thank you for bringing this question forward. Storing your medicinal herbs correctly is a journey worth taking carefully. Remember, the key takeaways are to ensure that your herbs are harvested at the right time, dried evenly and thoroughly, and stored in the optimal environment to retain their medicinal properties. Stay patient with the process; it’s a rewarding practice that will serve your health and wellness for many months to come!
