How To Become More Self-Sufficient Without Starting a Full-Blown Farm…
Want to start preserving your harvest, making your own soap, or building a backyard root cellar — but not sure where to begin? “Homesteading Advice” gives you instant lifetime access to 35+ practical homesteading books on food preservation, veggie gardening, DIY natural cleaning products (save over $250 per year with this skill alone), brewing, off-grid energy, and a whole lot more…
Click Here To Check It Out Now!
“I’m starting my own small-scale cheese-making operation in a little town in Vermont and I’ve read about the cheddaring process but don’t quite understand the specifics. Can you explain what cheddaring is and how it’s done? Any detailed steps or techniques would be really helpful!” Thanks, Laura, Montpelier, USA.
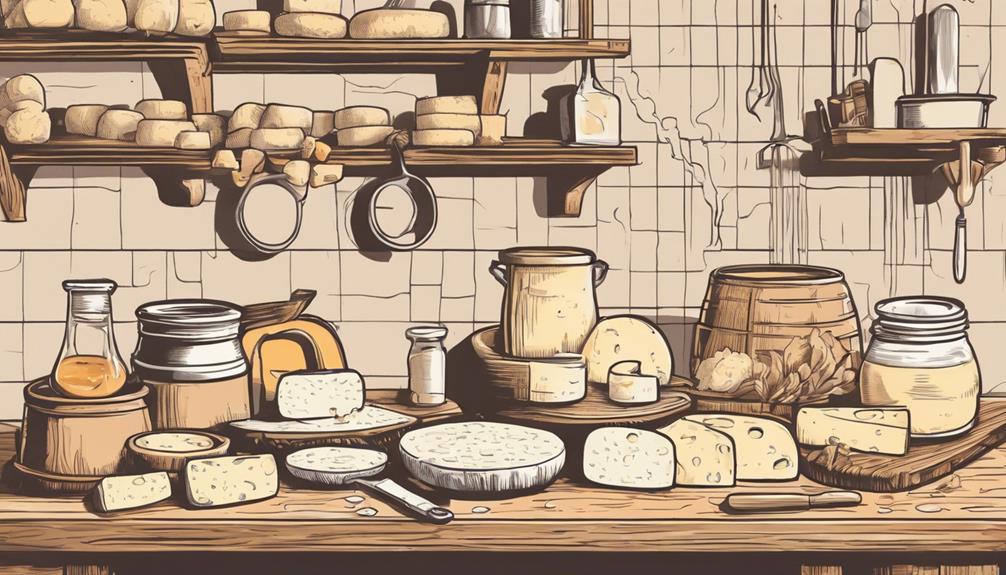
What’s Cheddaring, And How Is It Done?
Alright, Laura, let’s kick things off by getting you familiar with the process of cheddaring. This technique is a pivotal step in making cheddar cheese, and understanding it can significantly impact the texture and flavor of your cheese.
What Is Cheddaring?
In the world of cheese-making, cheddaring is a critical step that lends cheddar cheese its unique character. It’s a process of cutting, stacking, and turning the curd to expel whey and develop the cheese’s texture and flavor profile.
This method helps to knit the curds together, creating a firmer cheese. As the curds are stacked, repeated pressure from the stacking forces out moisture, which is essential for the aging process. The term “cheddaring” itself originates from this technique, and it’s named after the village of Cheddar in Somerset, England, where the cheese was first made.
Why Is Cheddaring Important?
1. Texture Development:
Cheddaring is vital because it transforms the curds into a more solid texture. This is essential for cheddar cheese, which is known for its firm, dense consistency.
2. Flavor Enhancement:
The process aids in developing the cheese’s distinctive flavor. By managing the acidity and moisture content, cheddaring ensures the cheese matures properly, enhancing its taste over time.
3. Moisture Control:
Expelling whey from the curds reduces moisture content, which is crucial for aging. Too much moisture can lead to spoilage, while too little can make the cheese overly dry and crumbly.
How to Do It: Step-by-Step Guide
1. Cutting the Curd:
After heating the milk and adding cultures and rennet to form curds, the curds are cut. This helps expel whey and makes the curds manageable for the cheddaring process.
2. Cooking the Curds:
The cut curds are then gently cooked. This is a crucial step to firm up the curds. The exact temperature and duration vary but typically, curds are cooked to around 102°F (39°C).
3. Draining the Whey:
Once the curds are cooked, the whey is drained off. This can be done by pouring off the liquid, but it often involves letting the curds settle and manually scooping or siphoning the whey.
4. Cheddaring the Curds:
Now to the heart of the process – cheddaring. This step involves:
- Cutting the Curds: The drained curds are cut into large blocks or loaves.
- Stacking the Curds: These curd blocks are then stacked on top of each other. This helps to press out more whey.
- Turning the Curds: The stacks are periodically turned. This ensures even pressing and expels whey consistently.
- Resting Period: Each stack is rested for about 10-15 minutes before being re-stacked and turned again.
- Consistency Check: This stacking and turning process is repeated for a few hours until the curds reach the desired acidity and texture.
5. Milling the Curds:
After reaching the correct texture and acidity, the curds are milled or torn into small pieces. This step is where the cheese starts taking on the familiar granular curd texture of cheddar.
6. Salting the Curds:
The milled curds are then salted. Salt serves multiple purposes: it seasons the cheese, helps expel more whey, and acts as a preservative.
7. Molding and Pressing:
Salted curds are then placed into molds. These are pressed to give the cheese its final shape and to expel any remaining whey. Pressing can take several hours to a few days, depending on the desired density and texture.
Considerations During Cheddaring
1. Temperature Control:
Keeping the curds at a consistent warm temperature is essential. If the curds cool down too much during stacking and turning, they won’t press properly.
2. Acidity Levels:
Monitoring the pH is important during cheddaring. The process is complete when the pH drops to around 5.2-5.3. This helps in planning the next steps of pressing and aging.
3. Hygienic Conditions:
Cheese-making needs to be a clean process. Ensure all tools and surfaces are sanitized to prevent contamination, which can spoil the cheese.
Tips for Successful Cheddaring
Let’s share a few handy tips to help you excel in cheddaring:
Starting Small:
When beginning, batch sizes should be manageable. This makes it easier to monitor and control all variables such as temperature and time.
Keep Notes:
Jotting down every detail from timings and temperatures to visual cues can be incredibly useful. If something goes awry, these notes make it easier to troubleshoot.
Be Patient:
Cheddaring can be time-consuming, but remember, good cheese is worth the wait. Rushing through the process can lead to unsatisfactory results.
Common Mistakes and How to Avoid Them
1. Inconsistent Stacking:
Make sure curd blocks are evenly sized and stacked properly. Uneven stacks can lead to irregular texture and moisture levels.
2. Improper Salting:
Adding too much or too little salt can affect the flavor and preservation. Mix it thoroughly to ensure even distribution.
3. Temperature Fluctuations:
Keeping a steady temperature is vital. Fluctuations can cause poor curd formation and affect the taste and texture. Consider using a water bath or insulated containers to maintain consistent temps.
FAQs About Cheddaring
1. How Long Does Cheddaring Take?
The typical cheddaring process can take anywhere from 2 to 6 hours, depending on the desired outcome and specific recipe.
2. Can I Skip Cheddaring?
Skipping this step would mean you’re no longer making traditional cheddar. While you may still make cheese, it won’t have the unique characteristics of cheddar.
3. Do I Need Special Equipment?
Basic cheese-making tools will suffice, but having a curd molder and press can be quite beneficial for consistent results.
Common Variations in Cheddaring
While the traditional cheddaring method is well-regarded, some artisanal cheese makers employ variations:
1. Flipping Frequency:
Some may flip the curds more frequently or allow different rest intervals depending on the flavor and texture profile they are aiming for.
2. Milling Size:
Curds can be milled into different sizes. Smaller pieces will result in a different texture compared to larger, coarser curds.
3. Aging Process:
The duration and conditions of aging can be tweaked, adding an extra layer of complexity and uniqueness to the final product.
Cheddaring Around The World
Cheddaring techniques may vary slightly based on regional cheese-making traditions:
UK Cheddar:
English cheddars are particularly famous, often aged longer for a sharper taste.
American Cheddar:
These tend to be milder and are often dyed with annatto to give them a distinct orange color.
Canadian Cheddar:
Known for its rich flavor, oftentimes aged for several years to develop a more intense taste.
Final Thoughts…
Laura, thank you for your fantastic question about cheddaring! Remember, the cheddaring process is the heart and soul of cheddar cheese. It takes time, patience, and a touch of art to perfect. Following the steps of cutting, stacking, turning, milling, salting, and pressing will help you craft cheese that’s not just tasty but also boasts the traditional cheddar characteristics.
You’ve got this, and happy cheese making!
