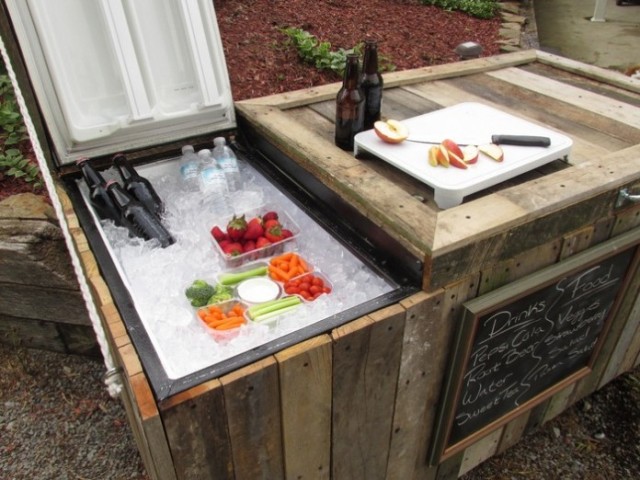
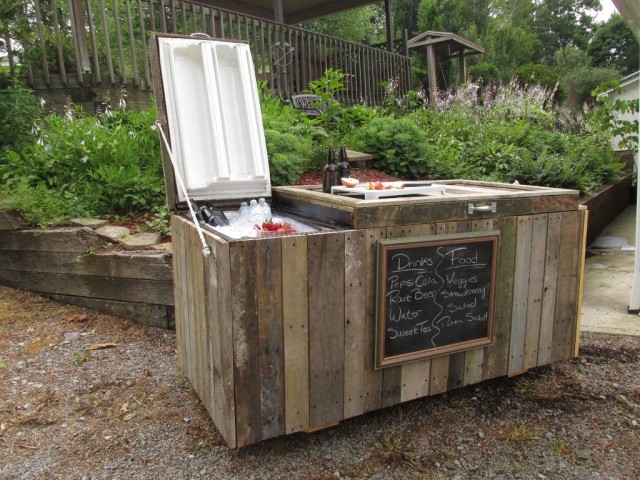
This DIY project will show you how to turn an old broken refrigerator into an awesome rustic cooler, great for parties, bonfires, and all of types of outdoor festivities. This project is easy to tackle and best of all it doesn’t cost a lot to build as most of the materials are recycled or reclaimed. This is also a great weekend project as it should only take a day or two from start to finish and doesn’t require any specialized tools beyond standard wood working tools like drills, drivers, and saws.
Features:
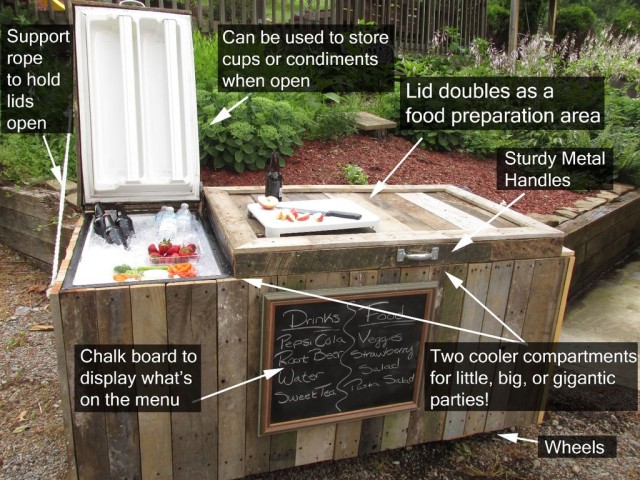
- It can be used as a small or large cooler depending on the size of your party. Intimate get together with friends? Just use the freezer space to chill a few beverages and some snacks. Big Ol’ Shin Dig? Open both the freezer and fridge spaces to create a huge cooler to chill all sorts of beverages and goodies. Just add ice.
- Sturdy flat topped lids are just the right height to double as an impromptu table or food preparation area.
- 4 heavy duty casters allow for the cooler to be easily moved
- When left open, the indoor fridge shelves serve as a great place to sort condiments or extra stacks of cups.
- After use the cooler can easily be drained of melted ice via a drain value installed in the bottom of the cooler.
- It looks great!
- It’s only $40 to make (if you happen to have an old broken fridge laying around, if not hit Craigslist).
- Front chalk board lets guests know what you have to drink/eat.
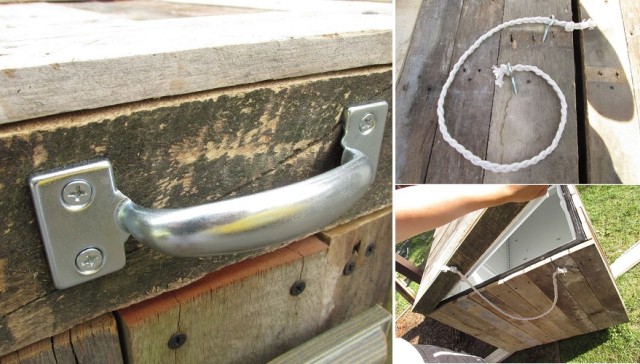
- Sturdy handles and rope lid supports make the cooler easy to open and keep the lids from opening to far.
Check It Out…
Step 1 – Tools & Materials
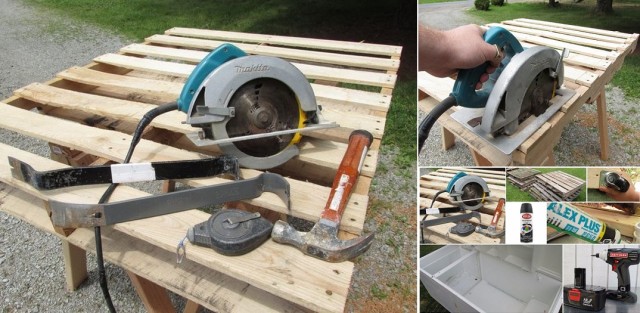
Materials List:
- Old Refrigerator
- Pallets – You’ll need about 4 pallets to get enough wood for this project.
- Screws – 1 1/4″ wood screws work well for this project
- Caulking
- Liquid Nails
- Casters – To make it move
- 2″ X 4″s – For framing in the bottom of the fridge and to build the base the cooler sits on.
- -Misc PVC/Brass Fittings – Used to construct a drain at the bottom of the cooler for easy draining after use.
- Rope and Eye Bolts – To keep the cooler lids from opening too far.
- Black Spray Paint
Tools Required:
- Drill/Driver
- Chop Saw
- Circular Saw
- Sander
- Caulking Gun – For plugging holes in the refrigerator to make it waterproof and for applying liquid nails.
- Pry-Bars and Hammers
Step 2 – Breaking Down The Pallets…
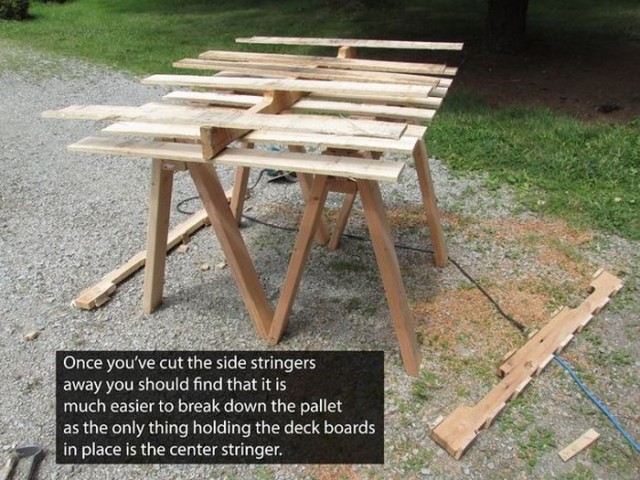
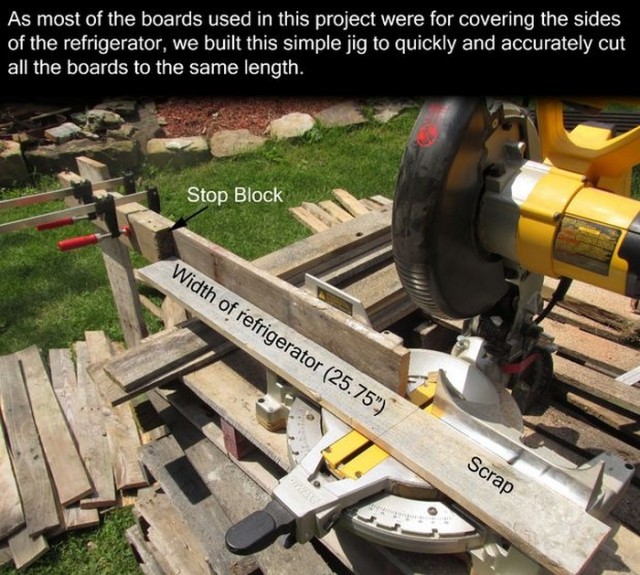
Step 3 – Processing The Wood Pallets…
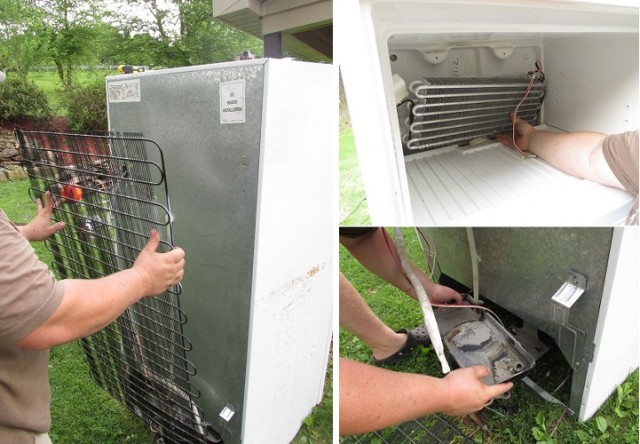
Step 4 – Taking Apart The Refrigerator…
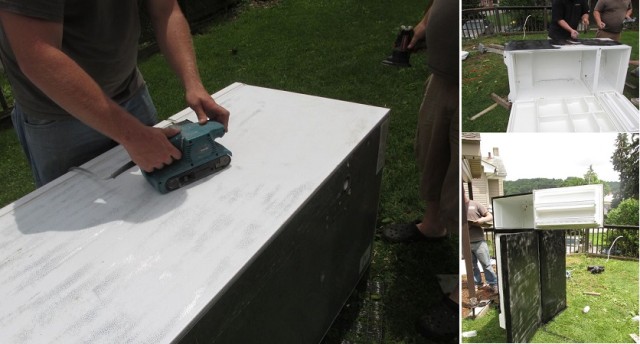
Step 5 – Painting The Refrigerator…
Step 6 – Adding The Pallet Wood Siding…
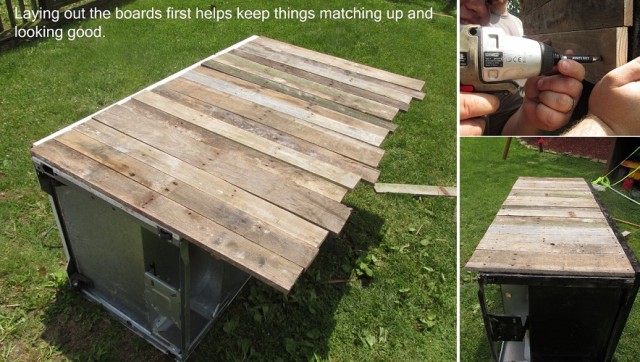
Step 7 – Covering The Doors With Wood…
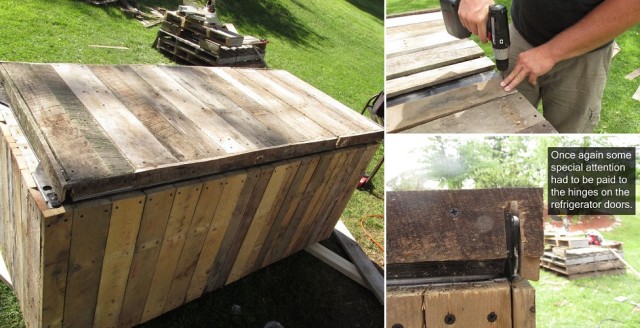
Step 8 – Building The Base…
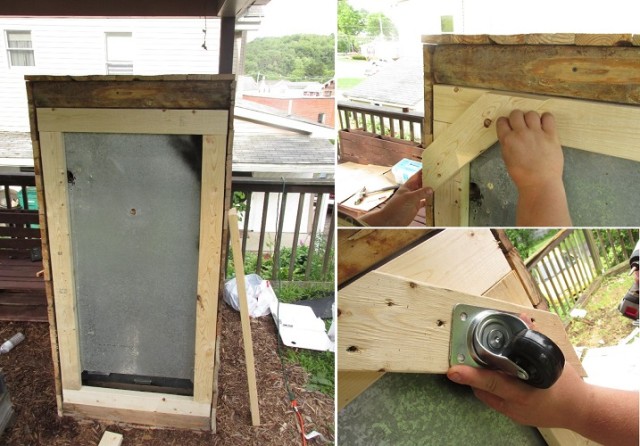
Step 9 – Water Proofing…
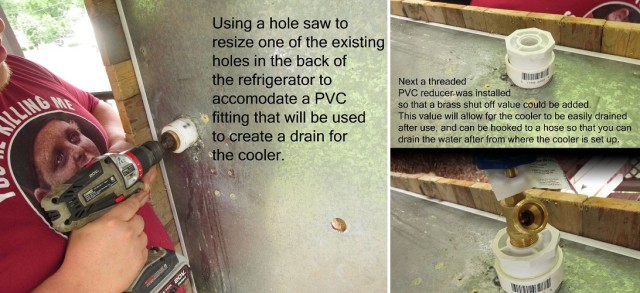
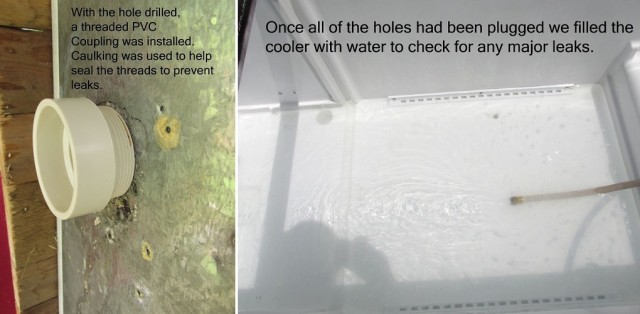
Step 10 – Adding The Finishing Touches (Handles, Chalkboard & Rope Lid)…
The Final Product…
You can find more detailed instructions about this project here. If you like this idea, be sure to share it with your friends and inspire someone you know. Anything becomes possible with just a little inspiration…
