See All: Food Preservation
Preserve Your Harvest For 25+ Years…
Preserve your home grown produce, create the perfect emergency food supply, make camping meals and healthy snacks. Unlike other methods of food preservation, freeze drying does not shrink or toughen food. It retains flavor, color, locks in nutrition, and allows you to preserve your home grown food for as long as 25+ years. Find out more here…
Learn How To Freeze Dry Like A Pro!
“Hello! So I’m knee-deep in canning season right now and just started to wonder whether I can actually can meat, fish, and poultry at home. I’ve done fruits, veggies, and jams for years but never tackled meat. I also live in a relatively humid region, so I don’t know if that changes anything with storage or the process itself. I’m a little nervous about safety and how long it lasts. Any tips for getting started without messing something up too badly?”
Thanks, Amanda, Auckland, New Zealand.
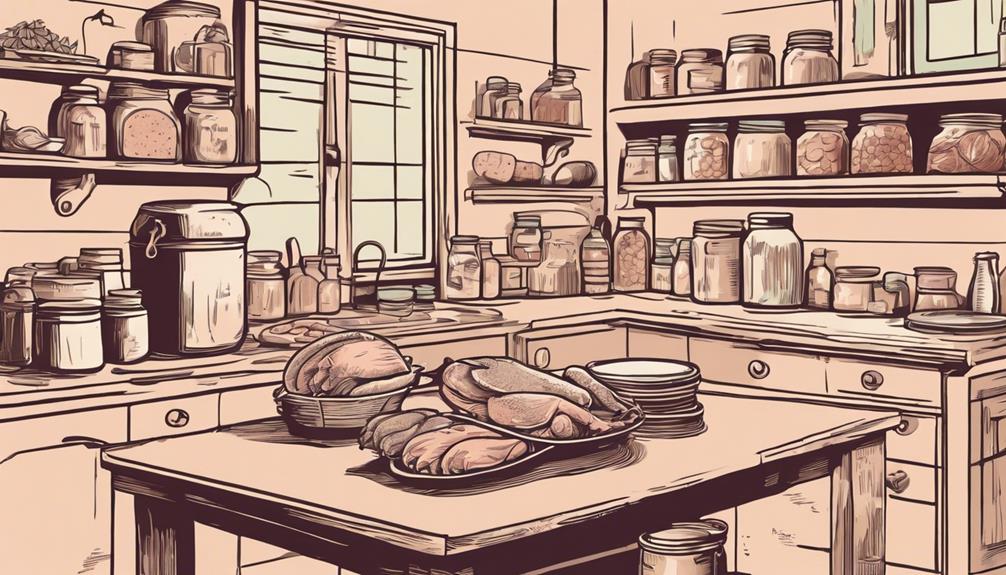
Can I Can Meat, Fish, and Poultry at Home?
The short answer, Amanda, is *yes!* You can absolutely can meat, fish, and poultry at home—but it takes a slightly different approach than canning fruits or veggies, and safety is key here. Since you’ve already been comfortable doing fruits and jams, you’re halfway there! Let’s walk through everything together step-by-step and ease that nervousness out of the way. And don’t worry—I’ll throw in some personal shortcuts I lean on when I feel a bit “lazy.”
Why Meat Is a Little Different
First off, here’s the thing with meat versus fruits and veggies: meat (and fish or poultry) is low-acid. That basically means we have to take more precautions to avoid any nasty bacteria like Clostridium botulinum (the one that can cause botulism). This is super rare—don’t get freaked out—but there’s a good reason why everyone stresses doing it right.
Low-acid foods must be preserved with some extra muscle. Unlike your strawberries or cucumbers which can get away with a water bath, meat can only safely be pressure canned. This gives a consistent, higher temperature (usually 240°F) to make sure any dangerous bacteria bites the dust. If you’re unfamiliar with a pressure canner, don’t panic! A pressure canner isn’t that different from a pressure cooker, but it’s designed specifically for canning, so it’s more precise.
How Do I Get Started Canning Meat?
Alright, Amanda, let’s talk meat! Canning your chicken, beef, pork, fish, or some wild game if you’ve got that lying around is all doable. Here’s a step-by-step to get you started.
Step 1: Use a Clean Workspace and Tools
Canning meat is no joke when it comes to cleanliness. Wash, dry, repeat! Make sure you sterilize your jars, rings, and lids, and clean your workspace really well. If you’ve done jams or veggies before, you’ve probably already got a good routine going for sterilizing, so do just the same here.
Step 2: Prepare the Meat
There are a couple of ways you can prepare your meat for canning:
- Raw Pack: Simple and straightforward—just pop raw chunks of meat straight into the jars. Make sure to leave about an inch of headspace, which is the space between the lid and the food. This method is quick, plus the juices from the meat will create its own broth as it pressure cooks. Personally, I love this because it saves me time and dishes (yep, “lazy” shortcut alert!).
- Hot Pack: You sear or cook the meat first, then pack it in. It’s a nice option sometimes because it gets rid of some of the fat, and for some folks, it makes the texture inside the jar a little more tender. If you prefer to avoid draining fat later, go for this method.
Step 3: Load the Jars
Add liquid if you’re using the hot pack (broth or boiling water) just enough to cover the meat. Again, leave about an inch or so of headspace.
Step 4: Pressure Canning Time!
Now, here’s where the pressure canner comes in. Fill it with the right amount of water—usually 2-3 inches in the bottom, or whatever your canner’s manual suggests—and place the jars inside on the rack. Don’t let jars touch each other or the sides of the canner, as you want proper circulation.
For meats, you’ll typically process the jars at 10-12 pounds of pressure (PSI) depending on your altitude, and you’ll need to follow the recommended processing times. Check out the table I’ve included below for guidance depending on what type of meat you’re canning, but these times are crucial for safety, so stick to ’em!
| Type of Meat | Processing Time (Quart) | Pressure (PSI—up to 1000ft altitude) |
|---|---|---|
| Chicken (Bone-in or Boneless) | 75-90 minutes | 11 PSI |
| Beef / Pork | 90 minutes | 11 PSI |
| Fish (Salmon, Trout) | 100 minutes | 11 PSI |
| Ground Meat | 75 minutes | 11 PSI |
| Game Meat (Venison, Elk) | 90 minutes | 11 PSI |
Step 5: Let Things Cool Slowly
Once the processing time is done, turn off the heat and leave the canner to depressurize on its own. Don’t rush this part—lifting the weight or opening the canner too soon could lead to broken jars or under-processed food. This is one of those “patience” moments I always have to remind myself of!
Step 6: Check Your Seals
After everything is fully cooled, and the canner is safe to open, carefully remove your jars. Let them sit undisturbed until completely cool, then check the seals by pressing down on the center of the lids. If they bounce back, sadly you’ll need to reprocess or refrigerate and eat those ones right away. But if the lids are firm and don’t dip in, your meat is good to go!
Does Altitude Affect Canning Meat?
I noticed you’re in New Zealand, Amanda, which can be a bit of a hilly or mountainous region. So yes, altitude definitely plays a part in pressure canning. The higher you live, the lower atmospheric pressure becomes, meaning you’ll need to increase the pressure (PSI) to make sure your meat is processed safely. For every 1,000 feet above 2,000 feet, add 1 more PSI. Your pressure canner’s manual might have a chart too—be sure to check it out!
How Long Does Canned Meat Last?
Canned meat is actually a long-term solution—one of the beautiful things about it! Properly canned and sealed jars of meat can last up to 12-18 months when stored in a cool, dark, and dry place. I always say if the meat looks, smells funny, or the jar’s seal is broken, toss it. Better safe than sorry!
If your storage area is humid, like you mentioned, it’s extra important to check the storage space regularly. Humidity itself shouldn’t affect the meat in the jar, but rusty lids or rings could lead to compromised seals. If that’s something you deal with, consider removing the rings after the jars cool (just store with the lid). Rings tend to trap moisture, which can lead to rusting.
Can I Pressure Can Ground Meat?
Yes! Ground meat—whether it’s beef, pork, or poultry—can be canned, but here’s a tip: it’s best to slightly brown the meat first and drain off excess fat before canning. That way, the fat won’t try to seep to the top of your jar, causing an imperfect seal.
Handling Canned Fish: Tips and Tricks
Fish is a bit special, whether it’s salmon, trout, or cod. If you’re going to can it, Amanda, you’ll want to pack it tightly. If using a raw fish fillet, you won’t need liquid. It’s highly recommended that fish be skinned and deboned, but if you’re canning small fish like sardines, some folks like leaving the soft bones in for extra calcium. After canning, just like meat, your fish lasts 12-18 months in storage.
Common Mistakes in Canning Meat and How to Avoid Them
1. Not Following Pressure Guidelines: Forgetting to adjust for altitude or going with a lower PSI can lead to improperly sealed meat, which risks more than just a ruined dinner—it can actually be unsafe to eat! Double-check both processing times and your PSI adjustments for your area.
2. Not Trimming Fat: Some folks love the flavor a little fat can bring, but too much will cause sealing problems. Especially with pork and fatty cuts, trim the extra fat or render it down first.
3. Opening the Canner Too Soon: Impatience is my middle name, but resist! You won’t believe how common it is for jars to crack or the food to not be fully processed if you try to rush that final cool-down.
What I Love About Canning Meat (Spoiler: It’s the Convenience!)
Preserving fruits and veggies is amazing, but man, there’s something extra satisfying about having jars of homemade chicken stew or seasoned pork just sitting in the pantry, ready to go. Life gets crazy sometimes, Amanda, and making dinner out of canned meat is honestly a lifesaver. Those times when I just do not have the energy? It’s so nice to pop open a jar, toss it with some noodles or potatoes, and call it a night!
Final Thoughts…
Amanda, I hope this breakdown really lightens the load for you and takes that worry out of your mind. Once you’ve done it the first time, you’ll be amazed at how easy and practical it is to have all that protein ready to go. Thanks for reaching out—I just know you’ll knock this out of the park and soon be practically swimming in beautifully preserved cans of meat!
Return To: Food Preservation
Preserve Your Harvest For 25+ Years…
Preserve your home grown produce, create the perfect emergency food supply, make camping meals and healthy snacks. Unlike other methods of food preservation, freeze drying does not shrink or toughen food. It retains flavor, color, locks in nutrition, and allows you to preserve your home grown food for as long as 25+ years. Find out more here…
