See All: Food Preservation
Preserve Your Harvest For 25+ Years…
Preserve your home grown produce, create the perfect emergency food supply, make camping meals and healthy snacks. Unlike other methods of food preservation, freeze drying does not shrink or toughen food. It retains flavor, color, locks in nutrition, and allows you to preserve your home grown food for as long as 25+ years. Find out more here…
Learn How To Freeze Dry Like A Pro!
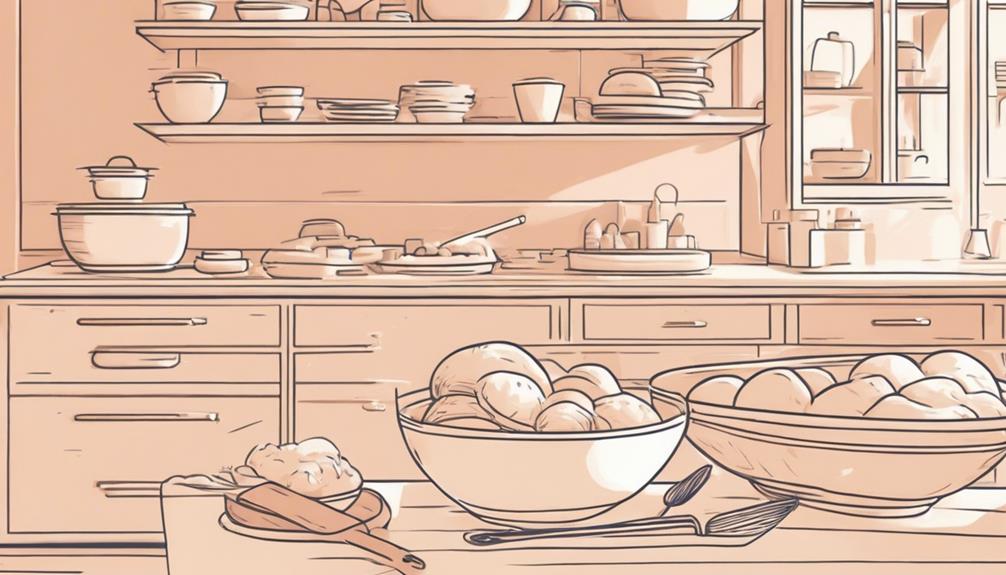
“Hi! I made a huge batch of homemade pizza and cinnamon roll dough recently, but I realized I don’t have enough time this week to bake them all. I’ve heard of freezing dough, but I’m not sure about the best way to do it or what to watch out for. Will freezing dough affect how it rises or bakes later? I’d hate to waste all this effort on bad results. Any tips for freezing raw dough properly? Oh, and does the type of dough matter? Thanks so much for your help!”
— Hannah, Christchurch, New Zealand
Yes, You Can Freeze Raw Dough—Here’s How!
Freezing raw dough is definitely possible, Hannah! In fact, I do it all the time when life gets in the way of my grand baking plans. Freezing dough is a great way to save time and still get that fresh, homemade taste straight from your oven without having to start from scratch each time. Once you know how to freeze everything properly, you’ll never feel rushed to bake.
But—there are definitely some things to watch out for. Let’s chat about how you should go about freezing different types of dough, tips for the best results when freezing, and answers to some of your most likely “what-if” scenarios.
Why Freeze Dough Instead of Fully Baking It?
First off, why even bother freezing raw dough, when you could save yourself the hassle and just freeze the finished product? Here’s why I prefer this method:
- Fresh taste: Freezing dough lets you thaw and bake it fresh whenever you want, and nothing beats that fresh-from-the-oven taste! You can plan out your baking and always enjoy your bread or pizza at its fluffiest and most aromatic.
- Longer storage time: Dough lasts much longer in the freezer than it would in the fridge or on the counter, letting you prepare ahead without worrying that it’ll go bad before you can bake it.
- Flexibility: Once the dough is frozen, you don’t have to use it immediately. You can keep it in the freezer for weeks or even a couple of months, depending on the type of dough.
- Convenience: You can set aside time to prep a large batch of doughs all at once (whether its pizza, bread, or cinnamon rolls… yum!) and save yourself multiple rounds of cleanup later.
In short, freezing raw dough can fit your schedule better, streamline your meal prep, and give you freshly-baked treats whenever you want them. Now, let’s break down how to do it properly.
The Best Types of Dough to Freeze
Not all doughs are made equal, though, right? You’ll be happy to know that most yeast-based doughs freeze beautifully as long as you know the proper techniques.
Here are a few common types of dough that freeze well:
- Pizza dough: Oh, yes. This is a lifesaver for pizza nights. Pizza dough freezes very well, and the flavor should stay just as good upon thawing.
- Bread dough: Whether it’s a basic white loaf, whole wheat, or sourdough (more on sourdough later), most breads freeze nicely at the dough stage.
- Sweet dough (e.g., cinnamon rolls, or brioche): Doughs loaded with butter, sugar, and eggs like brioche or cinnamon roll dough can be a bit trickier, but they still freeze quite well if done right. Just be patient with thawing.
- Cookie dough: While this isn’t bread, cookie dough also freezes wonderfully. Because most cookie dough doesn’t rely on yeast for rising, it can often go straight from the freezer to the oven.
One thing to keep in mind, though: doughs with heavy dairy components or an extra high sugar content might behave a little bit differently after freezing. They tend to be more prone to losing their structure, so watch them more carefully.
Does Yeast Dough Freeze Well?
I know you mentioned in your question, Hannah, that you’re worried about how freezing affects multiple types of dough, especially those that need to rise. The great news is that **yeast survives freezing**! However, frozen dough will take longer to rise during thawing. You might see slower activity in the yeast once you bring your dough out of the freezer, but as long as you give it time, the yeast will still do its job.
How to Freeze Dough Properly: Step-by-Step Guide
Now onto the practical part—that “how.” Let me take you through this step by step. These instructions can apply to most yeast-based doughs, regardless of what you’re making, although there are slight variations depending on whether it’s a pizza or a bread dough.
Step 1: Let the Dough Rise Once
Once your dough’s all mixed and kneaded, **let it rise once**. This is important. You want the yeast to do its first bit of work before freezing. The first rise helps develop the dough structure and flavor. For basic breads and pizza dough, this is non-negotiable.
For sweet doughs (like your cinnamon rolls, Hannah!), I like to let the dough go through **half** of its first rise. Sweet doughs can be finicky because all the sugar and butter slow down the yeast. That partial rise helps the dough start puffing but still keeps enough yeast activity for later.
Step 2: Shape the Dough (Optional)
You can either shape the dough into individual portions, or leave it as a whole lump. It’s honestly up to you and how you like to bake. If I make pizza dough to freeze, I like to portion them into balls that are right-sized for a pizza. You can do the same for buns, dinner rolls, or cinnamon rolls.
**Tip:** Shaping your dough before freezing also saves space, and helps later when you want single-portioned bakes.
Step 3: Pre-Freeze (Yes, it Matters)
Here’s a trick that some folks skip (because, let’s be real—it sounds like extra work). Place your portions of dough on a baking sheet, **spread out so they don’t touch**, and pop them in the freezer for about an hour. This is what we call “pre-freezing,” and it makes sure the dough doesn’t stick to everything once it’s solid.
Step 4: Store in Airtight Bags/Containers
Once your dough is nice and firm, grab some airtight plastic freezer bags or containers. Personally, I use freezer bags since they’re less bulky and I can label them easily (plus, they’re just all-around convenient for stacking). Press out as much air as possible before sealing it up.
Here’s **a pro tip** for you, Hannah: lightly coat the dough with olive or neutral oil before putting it into the bag. This prevents sticking, but also gives the dough a bit of moisture to stay supple.
Step 5: Label and Freeze
Label your bags or containers! Write the date you froze it and what type of dough it is. This way you won’t get things mixed up at the bottom of your freezer a month later. Most doughs will keep for **up to 3 months**. After that, you could still use them, but the quality may start to decline.
Thawing Frozen Dough: Time to Bake!
This part requires some patience, but it’s worth it to make sure your dough bakes up perfectly.
Thawing Instructions
When you’re ready to use your frozen dough, here’s how to do it:
- Move the dough from the freezer to the fridge **overnight**. It thaws gently this way and gives the yeast time to wake back up without being shocked by the warmth too fast. Depending on the size of the dough, it could take 8-12 hours to defrost.
- If you’re in a hurry, you can leave the dough **at room temperature** on the counter. Just keep in mind that this will work faster, but it will also be a bit trickier to control. It could thaw in 2-3 hours, but the downside is that your dough might get a little sticky on the outside or become harder to shape.
- Once it’s thawed, give the dough time to finish its final rise, also known as “proofing.” This is especially important for yeast dough, as the yeast needs this second rise to work its magic after surviving the freezer. It might take **up to 2 hours** to fully proof depending on the type of dough.
Common Thawing Mistakes to Avoid
For good measure, here are a couple things you should avoid:
- Don’t rush the thaw: While it might be tempting to speed it up with heat, don’t. Thawing in a warm oven will kill the yeast and change the dough’s texture.
- Re-freezing after thawing: Once dough’s thawed, don’t re-freeze it. Freezing multiple times can make the dough develop off-flavors and mess with texture.
Special Considerations for Different Dough Types
Here are some extra details that might come in handy depending on what you’re making, Hannah:
Pizza Dough Specifics
For pizza dough, I prefer to portion the dough out into individual pizza balls before freezing. It saves so much time when I’m craving a quick pizza! Plus, it’s easier to roll out right after thawing.
Also, if you like a nice, crispy thin crust like I do—you don’t need to give it a super long rise after thawing. A quick 30 minutes at room temperature and it’s ready to go.
Sourdough Freezing Tips
Sourdough can be a little more temperamental though. It’s not all that different from regular bread dough when it comes to freezing, but you have to be aware of the wild yeast (from your sourdough starter) slowing down. After thawing, you might need to give it extra proofing time. Don’t be discouraged if it seems sluggish—it’ll get going eventually!
Sweet Dough Considerations (Cinnamon Rolls, Brioche)
The dough for things like cinnamon rolls and brioche tends to be high in butter and eggs, meaning it must be **thoroughly thawed** before you try to bake it. These doughs benefit from a slow, refrigerator thaw. After that, make sure they’ve puffed up for their final rise—the last thing you want is a dense, underwhelming cinnamon roll.
Troubleshooting Frozen Dough
Dough not behaving as it should after thawing? Don’t worry—it happens to the best of us. Here are some troubleshooting tips for common problems:
If Your Dough Isn’t Rising
Dough that doesn’t rise after being frozen can be disappointing. But before scrapping it, check a couple things:
- Did you kill the yeast? If your dough was defrosted in a place that’s too warm, the yeast might have died. Always thaw in the fridge if you can.
- Give it time: Sometimes frozen doughs take longer to rise than freshly made dough. Be patient, especially with sweet doughs.
- Check hydration: Dough can dry out a bit in the freezer. Try kneading in a tiny bit of water or extra virgin olive oil.
If Your Dough Is Sticky
Nobody likes handling sticky dough! Check if this applies to your situation:
- Too sticky after thawing? Sprinkle extra flour as you shape or knead it.
- For pizza dough, stickiness can happen if it was too warm during thawing. A slightly cooler environment should help next time.
Final Thoughts…
Hannah, thanks for sending in your question! I hope this helped answer all those lingering doubts about freezing raw dough. Honestly, freezing dough is one of those game-changers that make your life in the kitchen easier without sacrificing the quality of your food. Just remember—proper storage, plenty of patience during thawing, and always letting that dough rise a second time will give you the results you’re hoping for.
You’ve got this, and I’m sure your pizza nights and cinnamon rolls are going to be a huge hit! Keep at it, and enjoy those perfectly preserved baking projects whenever you need them. 🙂
Return To: Food Preservation
Preserve Your Harvest For 25+ Years…
Preserve your home grown produce, create the perfect emergency food supply, make camping meals and healthy snacks. Unlike other methods of food preservation, freeze drying does not shrink or toughen food. It retains flavor, color, locks in nutrition, and allows you to preserve your home grown food for as long as 25+ years. Find out more here…
