How To Become More Self-Sufficient Without Starting a Full-Blown Farm…
Want to start preserving your harvest, making your own soap, or building a backyard root cellar — but not sure where to begin? “Homesteading Advice” gives you instant lifetime access to 35+ practical homesteading books on food preservation, veggie gardening, DIY natural cleaning products (save over $250 per year with this skill alone), brewing, off-grid energy, and a whole lot more…
Click Here To Check It Out Now!
“I’ve been trying to get into fermenting veggies like sauerkraut and pickles, but I’m wondering if I can use regular mason jars? I have a few of them already for canning, so I want to know if they’ll work fine or if I need to buy special fermenting jars. I keep reading things online about airlocks and special lids, and now I’m all confused! Help!” thanks, Patricia, Boulder, USA.
Can I Use A Regular Mason Jar For Fermenting?
Patricia, I totally get where you’re coming from! When I first started fermenting at home, I had the same question. All I had was a mountain of regular old mason jars in my pantry from canning tomatoes all summer long, and I wasn’t in the mood to buy fancy equipment. The good news? You can absolutely use regular mason jars for fermenting! But, as with anything, there are a few important details to keep in mind so you get the best, most delicious results without any weird smells or mold problems.
How Fermentation Works and Why It Matters
Before we jump into whether you can use a mason jar, it helps to understand why the container you use matters when fermenting. Fermentation is essentially the process where natural bacteria, like lactic acid bacteria, break down the sugars in your veggies, producing that tangy flavor we all love. But the key to this process is keeping the veggies in an oxygen-free environment—also known as anaerobic conditions—so only the good bacteria flourish, and harmful bacteria or mold can’t take over.
This is where the debate over special fermenting equipment vs mason jars comes in. Ideally, you want a container that keeps air out but still allows gases (like carbon dioxide) produced during the fermentation process to escape. Let’s chat more about how a mason jar holds up in this respect.
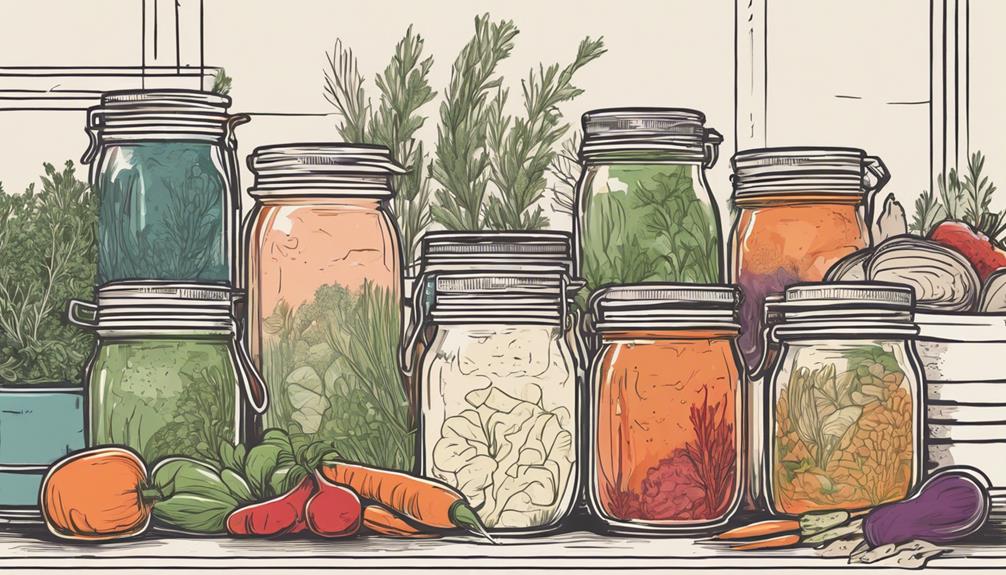
Yes, You Can Use Regular Mason Jars for Fermenting
There’s no need to go buy anything extra right now, Patricia. Mason jars can work, and they work well, especially for small-batch fermenting. Many people (myself included) prefer their simplicity and availability—they’re sturdy, clear (so you can peek at your project), and easy to come by.
But here’s the kicker: while mason jars can give you that anaerobic environment needed for fermentation, it does take just a tiny bit of attention to ensure things stay safe and sound. More on that in a minute!
Why Airlocks Aren’t Always Necessary
Airlocks, those spiffy gadgets you’ve probably seen online, are often recommended because they help you control the gases being produced during fermentation. They let gases like carbon dioxide escape while keeping oxygen from sneaking back in. The thing is, for most simple vegetable fermentations, you don’t really need an airlock. I’ve made more jars of sauerkraut, kimchi, and pickles than I can count without using one.
Instead of an airlock, as long as the vegetables are weighted down beneath the brine (so they don’t come into contact with air), you’ll be fine using a regular lid. Patricia, that means if you’ve got some canning jars screwing on their lids tightly, you’re already in business! Just remember to “burp” the jars—this means loosening the lid slightly when needed to let out gases, but we’ll get into that a bit later, too.
How to Ferment Using a Mason Jar: Step-by-Step
So, now that you know regular mason jars work just fine, here’s a simple step-by-step guide to show you how to ferment successfully using the jars you already own. No special lid, no airlock, just good ol’ mason jars.
- Start with Fresh Vegetables: Always use fresh, high-quality veggies when fermenting. If they’re going soft or losing their crunch, your end result won’t be as good. Patricia, I’m guessing since you’re into fermenting that you’ve probably got some garden-fresh options, which is perfect!
- Prepare Your Vegetables: After washing your veggies, chop, shred, or slice them however you’d like. For sauerkraut, you’ll want finely shredded cabbage, while cucumbers can be left whole (for pickles) or sliced. It’s really up to you.
- Make a Brine: If you’re salting specific veggies like cucumbers, dissolve sea salt or kosher salt into water for your brine. Or, if you’re making sauerkraut, you’ll massage salt directly into the cabbage until it starts releasing its own brine.
- Pack the Mason Jar: Pack the veggies tightly into the mason jar, leaving about an inch of headspace at the top to allow for bubbling. Pour in enough brine to cover the vegetables completely. Whatever you do, make sure the veggies stay under brine! You don’t want any of them exposed to air, or they could spoil.
- Weight It Down: What I typically do is put a small, clean rock or a glass weight on top of the veggies to keep them submerged. I’ve even heard of folks using a sandwich bag filled with brine—there are plenty of DIY options here, Patricia, so use what works best for you.
- Loosely Seal the Jar: Screw the lid on but not too tight. During fermentation, gases will need a way to escape, so you don’t want to create a vacuum-sealed environment. It’s a good idea to “burp” the jar every day or every few days, depending on how active the fermentation is, to release any built-up gases. All you have to do is unscrew the lid slightly for a second and then tighten it back up.
- Wait and Check: Place your jar in a spot at room temperature, but keep it out of direct sunlight. Fermentation times vary, but after a few days, you can start tasting your veggies. Sauerkraut and pickles tend to ferment for about 1-2 weeks, but it’s really based on your taste. The slower the fermentation, the better the flavor—especially if you move the jars into the fridge for a longer, more gradual ferment.
Common Issues When Fermenting with Mason Jars
Things usually go pretty smoothly, but sometimes you might still run into a hiccup or two when fermenting with mason jars. Here are some common issues you could encounter and how to fix them:
- Bubbling Over: This happens when fermentation is vigorous, and the gases don’t have an easy way out. It’s nothing to worry about, but it can get messy. To prevent this, make sure to burp your jars daily—this just means opening the lid briefly to let out some of those gases.
- White Film on Top: Sometimes you’ll see a cloudy, white film form on the surface, called Kahm yeast. It’s harmless but can add some bitterness. Scoop it off with a spoon as soon as you see it, and your ferment should keep going just fine.
- Off Smell or Mold: You’ll know if something’s gone wrong because the smell will become distinctly unpleasant—fermented vegetables should smell sour, but not rotten. If mold is present or the smell is way off, toss it and start over. This often happens if the vegetables weren’t fully submerged, so double-check that they’re under the brine throughout the process.
Do You Need Specialty Fermenting Lids?
Patricia, I know you’ve seen mention of airlocks and specialty lids and might be wondering if they’re worth it. In many home kitchens, basic mason jars with regular lids are more than enough for fermenting. However, if you’re someone who ferments quite a bit, or if you’re going for larger batches or experimenting with more particular types of ferments (like miso or kombucha), you might find investing in a few gadgets useful in the long run. But don’t feel pressured—start with what you have and go from there.
Some folks like those fancy fermenting lids or airlocks because they reduce the need for manual burping, but I personally find it “therapeutic” to check on my ferments now and then (and hey, it never hurts to get a whiff of that tangy goodness doing its thing)! For smaller batches, regular lids work fabulously.
Fermenting Tips You Might Not Have Thought Of
Here’s a little extra advice for fermenting in mason jars that I’ve picked up over the years:
- More Salt Isn’t Always Better: Don’t overdo it on the salt. Salt helps preserve the veggies and prevents those nasty bad bacteria from developing, but too much can make everything taste overly salty and stop fermentation in its tracks. Stick to a ratio of around 1 tablespoon of salt per 2 cups of water for your brine.
- Avoid Metal Lids: Over time, the acidity from the fermented veggies can corrode metal lids, making them more prone to rust. Stick to canning jar lids with a plastic lining, or screw on a layer of wax paper between the lid and the jar to help avoid this corrosion.
- Temperature Affects Speed: The warmer your kitchen, the faster fermenting will happen. I keep mine on the counter next to the stove, and during the summer, things ferment really quick! In colder weather, it may take longer, but the flavor tends to be more developed the slower they go.
Where to Store Mason Jar Ferments
Once your veggies are tangy and delicious, you’ll want to stop fermentation by transferring them to the fridge. Keeping them cold halts the process so they don’t end up over-fermenting and turning mushy. In the fridge, the ferments can stay good for months! I don’t think I’ve ever had a jar of kraut that made it longer than a couple of weeks before I devoured it, but in theory, they can last for a long time.
Final Thoughts…
Patricia, thanks a bunch for reaching out with such a great question! It’s totally possible to ferment with regular mason jars, so don’t feel pressured to go out and spend money on new gear unless you’re ready for it. Just keep things simple—submerge your veggies, add salt, and poke your head in now and then for a smell (or burp). Before long, you’ll have some homemade, delicious fermented bites at home! Happy fermenting!
