How To Become More Self-Sufficient Without Starting a Full-Blown Farm…
Want to start preserving your harvest, making your own soap, or building a backyard root cellar — but not sure where to begin? “Homesteading Advice” gives you instant lifetime access to 35+ practical homesteading books on food preservation, veggie gardening, DIY natural cleaning products (save over $250 per year with this skill alone), brewing, off-grid energy, and a whole lot more…
Click Here To Check It Out Now!
“Hi, I’m looking to get into vacuum sealing to preserve some of my dried herbs and dehydrated veggies, but I don’t want to keep using plastic bags all the time. Can I vacuum seal in jars or containers instead of bags? I love that vacuum sealing keeps food fresh for longer, but plastic waste is a concern for me. How do I do it properly, and is there anything I should watch out for? I’ve got plenty of mason jars and a few glass containers with snap-on lids, so I’d love to know if I can use them. Thanks!” Susan, Bend, USA.
Can You Vacuum Seal in Jars or Containers Besides Bags?
Absolutely, Susan, you can vacuum seal in jars and containers, and I totally understand your concern about cutting down on plastic. Vacuum sealing doesn’t just have to be about plastic bags—there are actually some really handy alternatives like canning jars and compatible reusable containers. Let’s dive into how you can make this work, and I promise, it’s easier than it seems.
Why Vacuum Seal in Jars or Containers?
If you’re used to vacuum sealing in plastic bags, the idea of using jars or containers may seem a bit different. But actually, vacuum sealing in jars and containers has some fantastic perks. Here’s a quick rundown of why this method might be better for you:
- Less Plastic Waste: Jars and containers can be reused, which is perfect if you’re trying to cut down on single-use plastic.
- Preserving Fragile Foods: Dried herbs, chips, or anything delicate is better off in a jar where they won’t get crushed like they could in a vacuum-sealed bag.
- Better for Liquids: If you’re vacuum sealing soups, stews, or anything with moisture, jars and leak-proof containers are ideal—you won’t have to worry about the vacuum machine sucking up the liquid (which can damage it, by the way!).
- Airtight for Long-Term Storage: Dry goods like flour, rice, grains, or even snacks like jerky stay fresher longer without the risk of any unintentional tears in plastic bags.
- Great for Fridge and Freezer: Jars and containers can move easily between the pantry, fridge, and even the freezer if they’re freezer-safe.
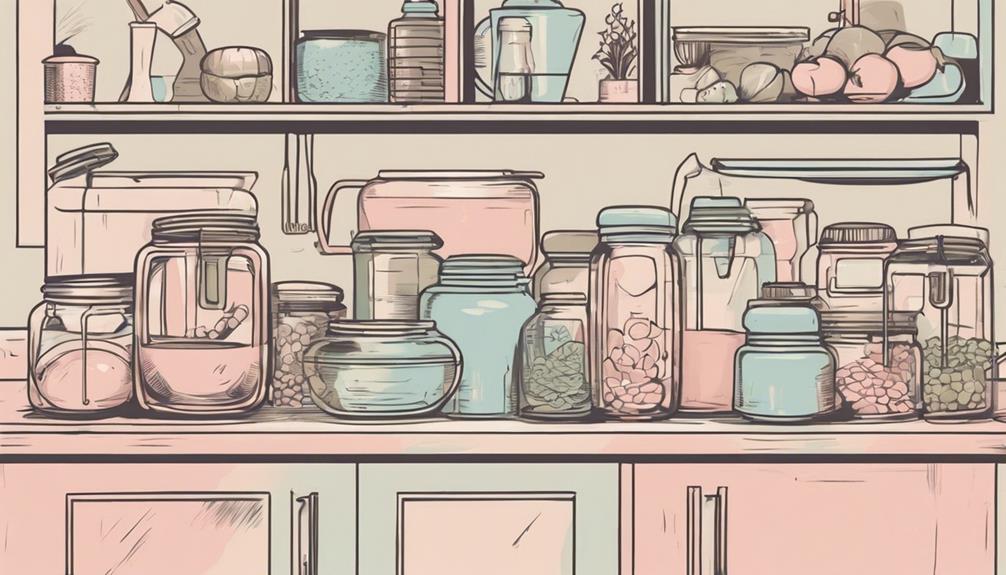
Materials You’ll Need for Vacuum Sealing in Jars
To start vacuum sealing in jars, you’ll need a few extra tools compared to using bags. But don’t worry, Susan, you probably already have most of what’s needed in your kitchen:
- Mason jars: Choose regular-mouth or wide-mouth depending on your machine’s attachments; I usually like how wide-mouth jars are easier for pouring things in and out, but both work perfectly fine.
- Metal lids with bands: You’ll be using canning lids (the two-piece kind) that create a tight seal. Make sure the rubber part is in good condition!
- Vacuum sealer with jar attachment: You’ll need a vacuum sealer with a special attachment, usually made to fit wide-mouth or regular-mouth jars (whichever you have).
- Reusable containers with compatible lids: Some specialty containers are made specifically for vacuum sealing. Snap-on lids with a vacuum port work best for these.
How to Vacuum Seal Using Jars: Step-by-Step
Now let’s get down to the fun part—sealing your goodies in jars! This works similarly for both mason jars and reusable containers, but let’s stick with mason jars for now since they’re widely available.
Here’s how to seal your food in jars step-by-step:
- Prepare your jars: First, make sure your jars are clean and completely dry. Any moisture left inside can cause mold or spoilage, especially if you’re storing dry foods like herbs or dehydrated veggies.
- Fill the jar: Leave a bit of space at the top of each jar. Try not to overfill it because overstuffed jars won’t vacuum seal as airtight. About a half-inch headspace works for most dry foods.
- Add the lid: Place a clean, dry canning lid on top of the jar (those flat metal circles). Then, screw on the metal band, but only finger-tight—don’t overtighten it just yet.
- Use the vacuum sealer: Attach the jar sealer onto the jar’s mouth, and connect the hose to both the sealer and jar attachment. Start the vacuum process and watch—within seconds, you should see the vacuum take out the air, and the jar will seal.
- Test the seal: Once sealed, press the lid gently in the middle. If it doesn’t budge or “pop,” you’re good to go! Just be sure the lid is securely on before storing.
Can You Reuse the Lids?
Oh, Susan, this is a great question! The answer is yes, but there’s a caveat. While you can reuse canning lids that have been vacuum-sealed, keep in mind that they may wear out over repeated uses, especially if you’re canning with them. Personally, I try to reuse mine up to a few times for dry food storage, but once in a while, if the seal seems weaker, I just swap it for a new lid.
Troubleshooting Common Issues
Ok Susan, sometimes things might not go as smoothly as we’d like. Let me walk you through a few common hiccups when vacuum sealing with jars and what you can do to fix them. Don’t worry too much if these happen—there’s almost always a simple fix!
The Lid Won’t Seal
I’ve had this happen a few times, and it can be such a headache! Here are a few reasons why the seal might not be taking:
- Improperly cleaned jars or lids: Double-check that everything is squeaky clean and dry. Even a tiny bit of food residue or moisture can prevent a seal.
- Is the food too fine? If you’re packing in something like flour or powdery substances, those particles can sometimes interfere with the sealing surface. You can always pop a little piece of paper towel on top before sealing to act as a barrier.
- Check your jar sealer attachment: Make sure it’s snugly seated on the jar. If it’s a little loose, you won’t get a solid vacuum.
The Vacuum Seal Breaks Later On
You think everything is sealed up nicely, but then, a day or two later, you notice the seal has broken. Ugh, I hate when that happens! This could be due to a few things:
- Faulty lid or scratched rim: Sometimes the metal lids or the jar rim might have imperfections. You’ll want to check for nicks or scratches where the seal is made.
- Temperature changes: If the jars experience large swings in temperature (e.g., moving from a hot kitchen to a cool pantry), the heat expansion and contraction can weaken the seal. Keep them in a steady temp when possible.
Other Types of Containers for Vacuum Sealing
So, while mason jars seem to be the go-to for dry food storage, let’s not forget about other reusable containers that can also work well, Susan! These can be quite handy, especially for storing liquids.
A couple container types that work:
- Vacuum-sealable glass containers: Some of these come with vacuum ports built right in the lid. They’re great for storing leftovers like soups or sauces (no risk of spilling while sealing).
- Plastic reusable containers: If you’re fine with plastic here and there, vacuum sealing-safe containers made from specialized plastic can sometimes be more lightweight and space-saving than jars.
Just remember, verify if your containers are freezer safe if you plan to pop them in the freezer, and make sure the lids fully click into place before vacuuming!
What Can You Store in Vacuum Sealed Jars?
Honestly, Susan, almost anything! But I’ll give you a few of my favorite go-to foods that store super well:
- Herbs and Spices: Dried basil, rosemary, dill—your homemade herb blends will taste much fresher longer.
- Dehydrated fruits and veggies: Dried tomato slices, apple chips, or mushrooms—because you definitely don’t want these to get moisture back in them.
- Grains and Legumes: Flour, rice, quinoa, beans—they not only stay fresh but also bug-free (nobody loves a pantry moth invasion).
- Snacks: If you prefer those crunchy chips or crackers staying crispy for longer, vacuum sealing works wonders.
Final Thoughts…
Susan, thank you so much for this fantastic question! Vacuum sealing in jars and containers is truly a wonderful way to preserve your food while cutting back on waste. It takes a little practice to get the hang of it, but I know you’re going to love how easy it becomes once you’re in the groove. Keep experimenting with sealing new things, and you’ll be amazed at how much longer your food stays fresh!
