How To Become More Self-Sufficient Without Starting a Full-Blown Farm…
Want to start preserving your harvest, making your own soap, or building a backyard root cellar — but not sure where to begin? “Homesteading Advice” gives you instant lifetime access to 35+ practical homesteading books on food preservation, veggie gardening, DIY natural cleaning products (save over $250 per year with this skill alone), brewing, off-grid energy, and a whole lot more…
Click Here To Check It Out Now!
“I’ve always been curious about fermenting my veggies like cabbage and carrots, but I’m worried the process might need a ton of special tools or equipment. I only have a small kitchen here in Wellington, and I don’t want to invest in something expensive or bulky if it’s not absolutely necessary. Is there any special equipment I really need to start fermenting, or can I just make do with what I already have? Also, are there any common mistakes or shortcuts you could share that would be helpful for a first-timer trying fermentation at home?” Thanks, Greg, Wellington, New Zealand.
Do I Need Any Special Equipment To Start Fermenting Food?
Hey Greg! Absolutely love that you’re thinking about trying out fermenting veggies! It’s such a fun way to preserve food, plus you get to create something tasty and full of good-for-you probiotics. The best part: You don’t need a bunch of fancy gizmos or anything complicated. Let’s dive into what’s really necessary, what’s helpful, and what you can easily substitute with things you may already have lying around the kitchen.
What’s Absolutely Necessary for Fermenting?
The good news is you really need just a few simple things to get started with fermenting food. Most of them, you probably already have:
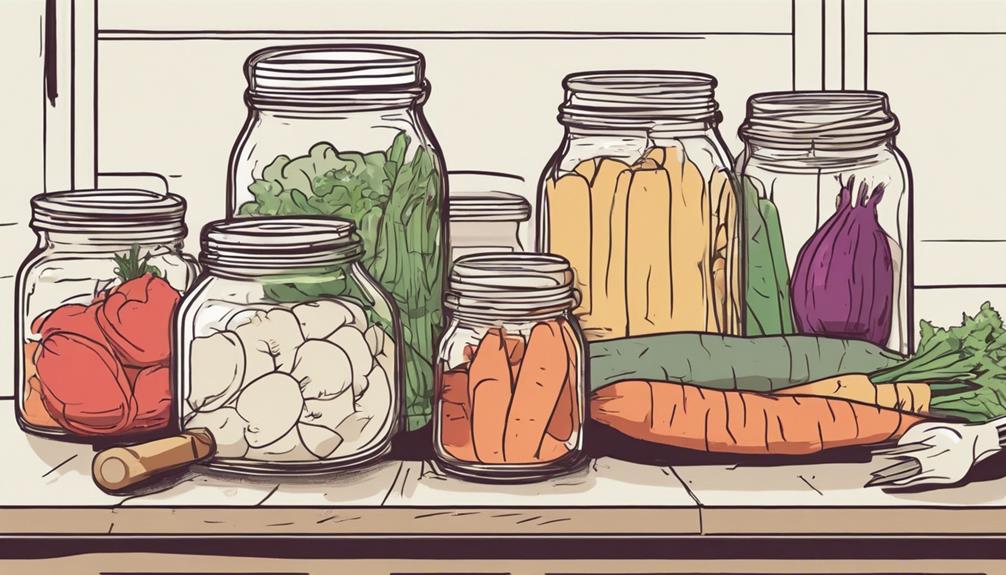
- Clean Jars or Containers: Any glass jar works for fermenting. Mason jars are a popular choice. They’re durable, easy to find, and you probably have a few stashed somewhere. The key is that it’s clean (like, super clean) and doesn’t have any cracks or chips where bacteria can hide.
- Lid or Covering: You’ll need something to cover your jars, but you don’t need to get all fancy with special fermenting lids. A regular jar lid works just fine in most cases. If you’re really minimalist, you can just use a cloth and a rubber band to keep dust and flies out!
- Salt: This one’s important because salt helps create the right environment for fermentation. You’ll want non-iodized salt, like sea salt or kosher salt, because iodine or anti-caking agents in regular table salt can interfere with fermentation. You don’t need anything expensive here—just pure salt.
- Vegetables (Naturally): Grab whatever’s in season or hanging out in the crisper. Cabbage, cucumbers, carrots, beets—almost any veggie can be fermented.
That’s it—told you it wasn’t overwhelming, right? You can honestly start fermenting this afternoon with just these few basics. Let’s dig into some things that are *helpful* but not essential and might make the whole process more convenient.
Helpful (But Not Essential) Tools
Alright Greg, so these things might *sound* fancy, but they’re totally optional. They can improve your results or simplify the process, but you’re not doomed if you don’t have them!
- Fermentation Weights: When you ferment, you want to keep the veggies submerged under the brine so they stay safe from bad bacteria. A fermentation weight presses the veggies down to keep them under water. If you don’t want to buy these, you can use a small ziplock bag filled with extra brine or even a smaller jar inside the big jar as a makeshift weight.
- Airlock Lid: Some folks love using airlocks, which let gases escape without letting air in. These can help prevent mold and make the process more foolproof. But, you honestly don’t need them because ‘burping’ (opening the lid slightly to release pressure) works just as well. It’s a little more hands-on, but it definitely doesn’t require special equipment.
- Mandoline or Knife for Slicing: Precision slicing helps ensure your veggies ferment evenly. A mandoline can create consistent shapes and speeds up the chopping process. If you’re okay with slightly uneven slices, a sharp knife does the trick just fine.
- Crock or Fermentation Vessel: If you’re planning on fermenting a larger batch—or maybe once you get deeper into the fermenting world—a crock is incredibly sturdy and great for making large, family-sized batches of things like sauerkraut or kimchi. But, for smaller, first-time batches, your average glass jars will work just as well.
See? Nothing too fancy or intimidating, huh? I’ve been fermenting for years, and I still use the homemade weights and regular glass jars (mostly because I’m too cheap to spring for special gear). The point is, you can get creative and use what you already have!
Common Mistakes (And How to Avoid Them)
Let’s be honest—fermenting can go wrong if you’re not careful, but most problems are easy to avoid once you know the pitfalls. Here are a few that tripped me up when I first started (so you don’t have to go through the same headaches):
Not Keeping the Veggies Under the Brine
The number one rule for fermenting: your veggies need to stay under the brine! Oxygen is an enemy—it leads to mold and yucky bacteria. This is where those weights come in handy. If you don’t have weights, like we talked about before, creative alternatives include using a smaller jar or plastic bag filled with brine to hold down your fermenting veggies.
Using the Wrong Salt
Regular table salt often has iodine and anti-caking agents. These can mess with the fermentation process and give your veggies an off flavor. Stick with pure sea salt or kosher salt for the best results. I remember once using regular table salt by mistake, and the whole batch ended up mushy. Trust me, Greg, pick the right salt!
Skipping the ‘Burping’
If you’re not using an airlock, make sure you open your jar just slightly every day to release the built-up gas. It sounds kind of technical, but it’s as easy as loosening the lid for a second. If you skip this, your ferment could bubble over, or the pressure might build until—pop!—explosion central. No one wants veggie juice all over their kitchen.
Letting Temperatures Fluctuate Too Much
Ferments usually do best between 60-72°F (15-22°C). Too hot, and they might over-ferment or spoil. Too cold, and the process slows way down. I’d suggest putting your jars in a cool area, like a basement or cupboard away from the oven. That’s where I tend to store mine because my kitchen in summer is like a sauna!
Shortcuts (Because Life Gets Busy)
Greg, I feel you—sometimes we just want to get to the tasty outcome without fussing too much. Here are a few shortcuts and lazy-girl hacks I’ve used more than once when life’s just a bit too hectic:
- “Let Gravity Do the Work”: Don’t have a fermentation weight and no energy to make a DIY one? Just pour the brine to the very top of the jar so there’s little air inside, then put the jar in a pan to catch any overflow. The veggies will press down into the brine on their own.
- Pre-made Saltwater: I sometimes mix up saltwater brine in bulk, so if I get inspired (or desperate to use up some veggies before they go bad), I have it on hand and don’t have to measure every time.
- Speedy Sauerkraut: Don’t bother massaging the salt into your cabbage for ten minutes like some recipes say. You can let the salt work its magic for 30 minutes without your help.
Troubleshooting: When Things Go Wrong
Fermenting isn’t always smooth sailing, but most problems have quick fixes. Here are a few issues that might crop up, and what to do about them:
Mold on Top of Your Veggies
Finding mold is probably the scariest thing for new fermenters. But don’t worry, Greg — it’s usually just surface mold and not harmful. Scrape off the fuzzy parts and make sure your veggies are fully submerged again. A little mold is not the end of your ferment, but recurring mold might mean you need to tighten up oxygen control.
Ferment Smells Off
Ferments have their own ‘funky’ smell, but there’s a difference between fermented and rotten. If it smells putrid, like spoiled trash, it’s best to toss it—something went wrong in the process. Usually, this happens if the jar wasn’t cleaned well enough or if the veggies were exposed to air for too long.
Veggies Turn Out Mushy
The crunchier, the better, right? If your veggies are limp or mushy, it’s often because the salt ratio was off, or the fermenting temperature was too high. This can happen pretty fast in warmer climates, so if your ferment starts smelling overripe, move it to the fridge sooner rather than later.
Advanced Insights: Fermenting Unusual Foods
Once you get comfortable with basic veggies, the options are endless. You can ferment more than just cabbages and root veggies. Here are a few fun ideas:
- Garlic: Yes, you can ferment whole garlic cloves. They turn slightly sweet and tangy after a few weeks, and they’re a great addition to meals.
- Fruit: Believe it or not, you can ferment fruit too! Just keep in mind that fruits ferment faster because of the sugar content and can go from yummy to alcohol-like if left too long.
- Hot Peppers: Want to make your own hot sauce? Just toss some hot peppers in saltwater and ferment them for a while. The result is a spicy, tangy sauce you’ll be making on repeat.
Final Thoughts…
Greg, I hope that clears up your concerns about needing any fancy gear to get started! Trust me, fermented foods are super forgiving, especially when you’re first starting. You don’t need to spend a dime on specialty tools if you don’t want to, and with some playful experimenting and a few shortcuts, you’ll be whipping up delicious ferments from your small kitchen in no time. Just remember to keep those veggies under the brine and don’t overthink it — fermenting is an ancient practice, and people have been doing it for centuries without anything fancy.
Thanks again for the amazing question, and happy fermenting!
