How To Become More Self-Sufficient Without Starting a Full-Blown Farm…
Want to start preserving your harvest, making your own soap, or building a backyard root cellar — but not sure where to begin? “Homesteading Advice” gives you instant lifetime access to 35+ practical homesteading books on food preservation, veggie gardening, DIY natural cleaning products (save over $250 per year with this skill alone), brewing, off-grid energy, and a whole lot more…
Click Here To Check It Out Now!
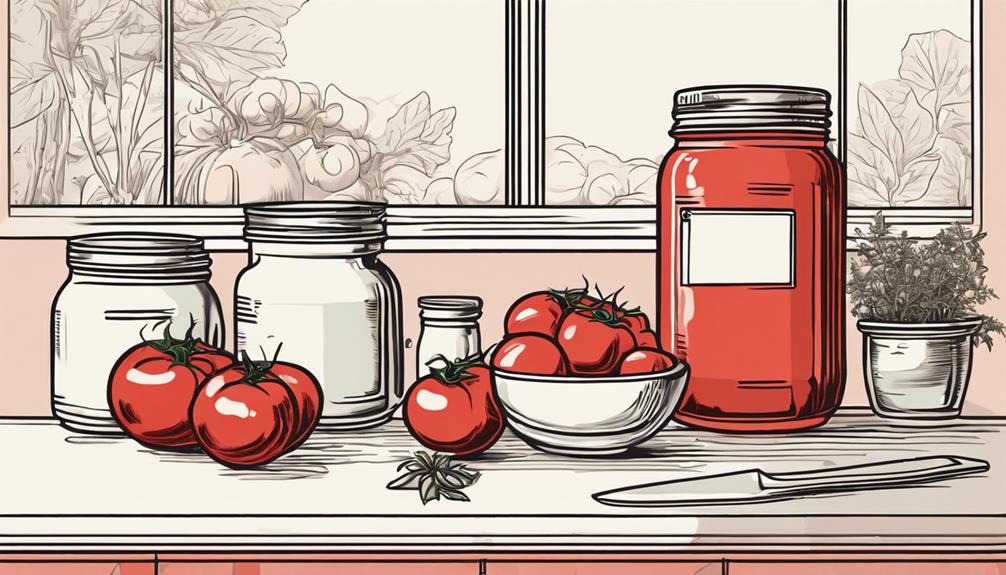
“I’ve got way more tomatoes than I know what to do with from my backyard garden here in Portland. I’ve been freezing some, but I’d love to try canning them—but I’m nervous! I’ve heard about botulism and other risks, so I want to make sure I do it right. I’m also wondering if I can can different types of tomatoes, because I’ve got a mix of heirlooms, romas, and some cherries. Should I be treating them all the same, or are there different steps depending on the type? Any advice for a first-timer?” Thanks, Margaret, Portland, USA.
How Can I Safely Can Tomatoes?
Oh Margaret, I hear you! Those backyard tomatoes tend to grow like crazy, don’t they? One minute, you’re watering a baby plant, and the next, you’re swimming in a sea of ripe, red fruit. Canning is a great way to preserve them for the winter months—or even just to free up some freezer space! Let’s go through exactly how you can safely get those tomatoes into jars, step by step, with zero worries.
Why Safe Canning is So Important
Let’s be real for a sec. Botulism is probably the number one fear for anyone new to canning, and with good reason. It’s rare, but it is serious. That’s why following proper safety precautions is key while canning tomatoes. Thankfully, tomatoes are more forgiving than some other foods due to their natural acidity, but not all tomatoes are equally acidic (more on that later).
To put it simply: canning incorrectly can lead to bacteria growth, which is what we want to avoid. Don’t stress though, Margaret; follow these guidelines and you’ll be golden.
Getting the Right Equipment Together
First things first, let’s talk about the gear. Here’s what you’ll need before you even pluck your first tomato off the vine:
- Canning jars: Stick with glass canning jars specifically designed for the job. They’re designed to withstand high temperatures and come in different sizes, but pint and quart jars tend to be the most common for tomato canning.
- Lids and rings: You can reuse the rings, but the lids need to be brand-new each time. They’re designed for a one-time seal.
- Water bath canner: Since tomatoes are generally acidic, a good ol’ water bath canner is all you need. It’s basically a massive pot with a rack to keep jars from touching the bottom.
- Lid lifter and jar lifter: They sound fancy but are lifesavers. The jar lifter helps to pull hot jars out of the water without dropping them. The lid lifter—a magnetic wand—will help you fish sterilized lids from boiling water safely.
- Bubble remover: This is just a small tool (or even a wooden chopstick works) to remove any air bubbles from the jars before sealing them.
What Tomatoes Can You Can?
Margaret, you’ve got a good mix of tomatoes in your garden—heirlooms, romas, and cherry tomatoes. The good news is, yes, you can can all of these! Here’s the thing, though: different tomatoes have slightly different characteristics when it comes to acidity and water content, so you might want to treat them a little differently, mostly when you’re working with different recipes like sauces, salsas, or crushed tomatoes.
Plum (Roma) tomatoes: These are the classic canning tomatoes. They’re meaty, with low water content, which makes them perfect for things like sauces and paste.
Heirloom tomatoes: While beautiful and delicious, heirlooms can be a little extra tricky because some varieties are less acidic. For safety’s sake, we’ll go over adding acid (you know, lemon juice or citric acid) in a minute!
Cherry tomatoes: These little guys are high in water content, so you’ll need a bit more patience when canning them. Blanching their skins off can be a fun little challenge too. More on that in a bit!
Step-by-Step: How to Can Tomatoes Safely
Alright, now the fun part—actually canning! Grab your tomatoes, and let’s get started with the whole process from sterilizing your jars to sealing them up for storage.
1. Picking and Prepping Your Tomatoes
Maggie, you already have your tomatoes, but for anyone else reading: make sure you use ripe, undamaged tomatoes. Moldy or soft spots are a no-go. Wash ‘em first—getting rid of dirt, bugs, and anything questionable is always a good idea. Once they’re cleaned, it’s time to blanch them, which helps make peeling the skins super easy (those skins don’t do well when canned, trust me).
Here’s how to blanch your tomatoes:
- Boil a big pot of water.
- Dunk the tomatoes in the boiling water for about a minute (you’ll see the skins start to split).
- Immediately transfer them to an ice water bath to stop cooking.
- Peel off the skins, which should now practically fall off.
2. Sterilizing the Jars and Lids
I’m all about skipping extra steps when I can, but when it comes to sterilizing, don’t cut corners. It’s super important to kill off any bacteria that could spoil your hard work. Give the jars and lids a good wash in hot, soapy water, then pop them in your canner or a separate pot of water to boil for 10 minutes. Keep them hot until you’re ready to fill them.
3. Adding Acid (Why This Step is Non-Negotiable)
I mentioned earlier that not all tomatoes are equally acidic—this is where adding acid comes in. Even if your tomatoes seem acidic, adding bottled lemon juice or citric acid ensures there’s enough acidity to prevent bacterial growth. Trust me, this isn’t the step to skip!
Here’s what you need to add:
- For pints: add 1 tablespoon of bottled lemon juice or 1/4 teaspoon of citric acid per jar.
- For quarts: it’s 2 tablespoons of bottled lemon juice or 1/2 teaspoon of citric acid.
If you’re not a fan of a sharp lemony taste, you can tone it down afterward with a little sugar when you use your canned tomatoes later.
4. Filling Your Jars
Now that you’ve added your acid, start packing in your prepped tomatoes. Depending on what you’re canning—whole, crushed, or as a sauce—the amount of air space at the top of the jar (called “headspace”) will vary.
- For whole or halved tomatoes: leave 1/2 inch of headspace.
- For crushed tomatoes or sauce: you’ll need a little more space, say 1 inch of headspace.
Use your bubble remover (aka that chopstick) to get any pesky air bubbles out, and wipe the rims of the jars with a clean, damp cloth to make sure you get a good seal.
5. Processing the Jars
Once your jars are filled and dated with lemon juice (or citric acid), it’s time to seal them up and process them in your water bath canner.
- Place the jars onto the canning rack of your water bath canner, ensuring the jars aren’t touching each other.
- Bring the water to a full boil, make sure it covers the jars by at least 1–2 inches, and process them for the time specified in your recipe (which can vary based on altitude—don’t forget!). The baseline for quarts is generally about 45 to 85 minutes for tomatoes, depending on whether they’re whole, crushed, or juiced.
Now, Margaret, since you’re in Portland, you likely won’t have to worry about high altitudes messing with your processing time, but anyone living above 1,000 feet should adjust. A quick altitude check and a processing time chart handy will save you any headaches.
6. Cooling and Storing Your Canned Tomatoes
After processing is done, take those jars out of the water bath canner carefully and set them on a towel on your counter to cool for about 12–24 hours. You’ll hear the lids “pop,” which means they’ve sealed properly. (My favorite part—it’s strangely satisfying!)
Once they’re fully cooled, remove the rings, wipe the jars clean, label them with the date, and store in a cool, dark place.
Troubleshooting Common Issues
Why Didn’t My Lids Seal? What Now?
Sometimes, despite your best efforts, a lid or two just won’t seal. If that happens, don’t panic—simply pop the jar in the fridge and use it within a week or so, or freeze the contents. Make sure to double-check that there’s no residue or chips on the jar rims for the next batch to ensure a good seal.
What If I See Bubbles?
Bubbles are normal as long as they’re small and don’t indicate spoilage. If you see very large bubbles or a lot of movement, something might not have sealed right—and that’s when it’s safer to toss the jar. The last thing we want is funky tomatoes!
Storing Canned Tomatoes Safely
Once your jars are sealed and labeled, be sure they’re stored properly. A cool, dark, and dry place is best, as heat and sunlight can shorten the shelf life of your tomatoes. They can last up to a year at full quality; after that, they may still be safe to eat, but the flavor or texture might begin to decline.
| Type of Tomato | Headspace | Processing Time (Based on pints & quarts) | Acid Additions |
|---|---|---|---|
| Whole or Halved (in water) | 1/2 inch | 85 minutes | 1-2 tbsp of bottled lemon juice or citric acid |
| Crushed Tomatoes | 1 inch | 45 minutes | Same as above |
| Tomato Sauce | 1/4 inch | 35-40 minutes | Add the appropriate acid |
Final Thoughts…
Margaret, I hope this helped ease any fears about canning your garden bounty! Canning tomatoes can feel like a science project at times, but with the right steps, it’s totally safe, and the satisfaction? Worth every jar. Just remember to follow the steps, add acid, and check those seals. Have fun stacking those finished jars—and boy, there’s nothing like using them on a cold winter day to make summer’s harvest last just a little longer.
Thanks for sending in such a great question, and I’m rooting for you to turn those tomatoes into something delicious!
