See All: Food Preservation
Preserve Your Harvest For 25+ Years…
Preserve your home grown produce, create the perfect emergency food supply, make camping meals and healthy snacks. Unlike other methods of food preservation, freeze drying does not shrink or toughen food. It retains flavor, color, locks in nutrition, and allows you to preserve your home grown food for as long as 25+ years. Find out more here…
Learn How To Freeze Dry Like A Pro!
“I’ve got a garden full of jalapeños down here in Newcastle, NSW, and they’re ripening fast! My family loves to put pickled jalapeños on tacos and sandwiches, and I’d like to make a big batch to store for when the garden isn’t producing. I’ve never pickled anything before, though, and I’m unsure where to start. I also want something I can easily share with my neighbors (if they’re willing to brave the heat)! Any tips for a simple but delicious recipe would be much appreciated!” Thanks, Melissa, Newcastle, Australia.
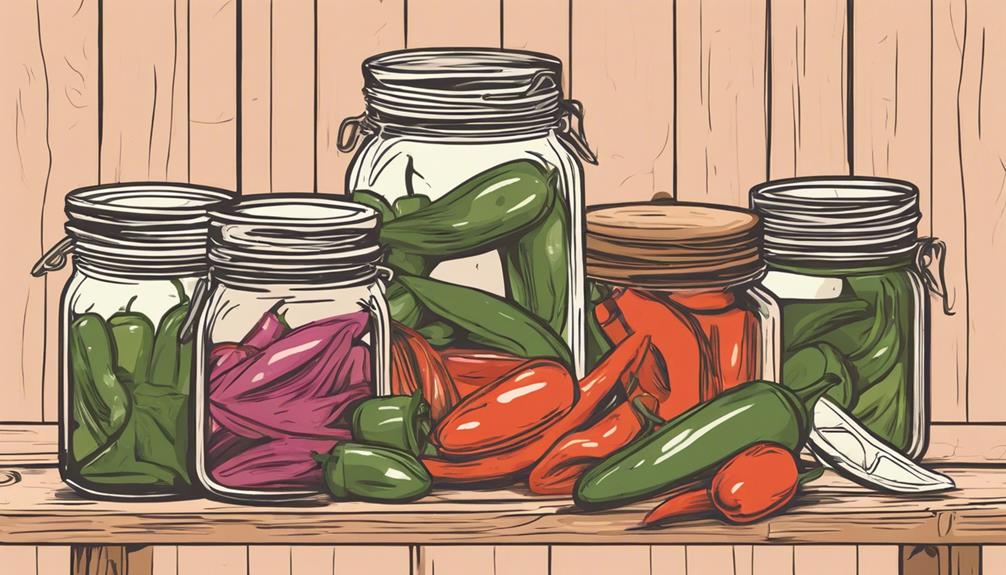
How Do I Make Pickled Jalapenos?
Hey Melissa! It sounds like you’re about to embark on a delicious and rewarding journey of preserving your jalapeños! Pickling is such a great way to keep the flavors of summer alive long after your garden wraps up for the season. There’s something about slicing into a jar of homemade pickled jalapeños in the middle of winter that feels *so* satisfying.
Let’s walk through it step by step, so even if you’re new to pickling, the whole process will feel like second nature in no time.
What You’ll Need to Make Pickled Jalapenos
Let’s get you started with a simple, easy-to-follow recipe first. Most ingredients will already be in your pantry—nothing fancy required! Here’s what you’ll need:
- Jalapeños: Fresh from the garden. Go for about 10-12 peppers for one pint jar, but of course, you can scale this up or down depending on your haul.
- Vinegar: You can use white vinegar, apple cider vinegar, or a mix of both. Vinegar is essential because it’s what safely preserves your peppers.
- Water: You’ll dilute the vinegar a bit to get the brine ratio just right.
- Salt: Pickling (non-iodized) salt is a must. Don’t use table salt with additives as it can make the brine cloudy.
- Sugar: Optional, but a little sugar helps balance the heat and tang, smoothing out the flavor.
- Garlic: Adds a great depth of flavor. Throw in about 2-4 cloves per jar, depending on your garlic love.
- Spices: You can add black peppercorns, coriander seeds, and bay leaves for extra flavor.
- Jars: Use canning jars with lids that seal tightly. Pint-sized jars are perfect for this recipe.
That’s it, Melissa—nothing you can’t handle! Now, let me guide you through the steps to get that spicy goodness into jars.
Step-by-Step Instructions for Pickling Jalapeños
Here’s a no-fuss process you can follow:
- Prep your jalapeños: First, wash those peppers well—especially since they’re coming straight out of your garden. Then slice them into rings. If you like a little less heat, you can remove the seeds (but honestly, I always leave them in for that extra spice).
- Prepare your brine: In a large pot, combine 1 cup of vinegar, 1 cup of water, 1 tablespoon of salt, and 1 tablespoon of sugar (if you’re using it). Heat the mixture until the salt and sugar dissolve completely, stirring occasionally.
- Pack the jars: While your brine heats, pack your sliced jalapeños into sterilized glass canning jars. Add in garlic cloves and any additional spices like peppercorns or bay leaves. You can get creative here based on your flavor preferences (I personally love adding a dash of coriander seeds).
- Pour the brine: Once the brine is hot and ready, carefully pour it over the jalapeños in the jars, leaving about half an inch of headspace at the top.
- Seal and store: Secure the lids on your jars. At this stage, you can either store the jars in the refrigerator for up to 2-3 months *or* process them using a water bath canner for about 10 minutes if you want to keep them stored long-term without refrigeration.
That’s all there is to it! If you’re refrigerating them, let the jars sit for 24-48 hours before digging in. This gives the jalapeños time to soak up that brine and get flavorful!
Troubleshooting Common Pickling Problems
Pickling is straightforward, but little hiccups can happen. I’ve had a few “oops” moments myself. So Melissa, here’s what to look out for:
- Cloudy Brine: This usually happens if you’re using table salt or over-processing the jars. Always stick to non-iodized salt like canning or kosher salt, and process the jars just long enough.
- Peppers too soft: If your jalapeños turn out mushy, it could be due to using overly ripe peppers or leaving them in boiling water for too long while processing. Make sure your peppers are still in good shape and firm before pickling.
- Don’t love the flavor? This is easily fixed! Play around with the vinegar-to-water ratio next time. Adding more garlic, sugar, or different spices can also make a huge difference. Every family seems to have their “secret recipe”—you’ll find yours too!
Canning Jalapeños Vs. Refrigerator Pickling
Melissa, you mentioned wanting to make a batch you can share with the neighbors, so let’s talk about how you can store them. There are two popular methods for preserving pickled jalapeños: traditional canning or refrigerator pickling.
Canning Jalapeños
If you’re looking to store jars in the pantry for months or even give them out as gifts, you’ll need to use a water bath canning method. It ensures the jars are shelf-stable. Here’s a basic overview:
- Once you’ve filled the jars with jalapeños and brine, place them into a pot of boiling water (make sure the jars are fully submerged).
- Boil the jars for about 10 minutes per pint jar (adjust for your altitude if you’re in the mountains like me!).
- After processing, remove the jars and let them cool. You should hear a reassuring “pop” as the lids seal.
With this method, the jars can last a full year. Hellooooo, jalapeños on-demand, right?
Refrigerator Pickling
This is the “lazy gardener’s” method—my go-to most days if I don’t want to haul out all the equipment. Simply make your brine, pack your jalapeños, and store them in the fridge. No water-bath canning required!
The drawback? They only last 2-3 months in the fridge, but seeing as they’re so tasty, they usually don’t make it past the first few weeks in my house.
How to Adjust the Spice Level
Pickled jalapeños pack a good punch, but if you or your loved ones aren’t quite ready for the heat, there are ways to bring that down a notch:
- If you reduce or remove the seeds, you’ll knock back the heat a bit. The seeds are where a lot of the fire lives.
- You can also blanch the jalapeños quickly in boiling water before pickling. This helps take the heat down a peg without sacrificing flavor.
And if you’re the opposite and want even more heat? Well, feel free to throw in some other spicy peppers—like a habanero or two—into the mix. Just be warned: not everyone will be brave enough to try those!
Ways to Use Your Pickled Jalapeños
Once your jalapeños are pickled and ready, there’s no limit to the ways you can enjoy them:
- On tacos: Obvious and delicious!
- Sandwiches: Give your sandwich a spicy kick with a few slices of pickled jalapeños.
- Pizza topping: Spicy jalapeños on cheesy pizza? Yes, please.
- Nachos: Are nachos even nachos without jalapeños?
- Mixed into salads: Slice ‘em up and toss them in if you like a bit of heat in your salad.
- Bloody Mary garnish: Spicy drinks call for an even spicier garnish.
If you’re thinking of sharing with neighbors, jar these up, add a ribbon, and voilà—you’ve got a thoughtful and spicy homemade gift.
Final Thoughts…
Melissa, thanks so much for sending in your question! I hope this has given you confidence in pickling your jalapeños and passing the heat along to friends and family. Enjoy the process (and the spicy rewards), and don’t hesitate to try a few different variations to make it your own!
Return To: Food Preservation
Preserve Your Harvest For 25+ Years…
Preserve your home grown produce, create the perfect emergency food supply, make camping meals and healthy snacks. Unlike other methods of food preservation, freeze drying does not shrink or toughen food. It retains flavor, color, locks in nutrition, and allows you to preserve your home grown food for as long as 25+ years. Find out more here…
