The Alaska Grow Bucket design is based on a Sub Irrigated Planter (SIP) that irrigates your plants from below and depends on a wicking medium to draw water up to the plant roots.
The advantage of this system over other container systems is the lack of pumps and timers to circulate water. The lack of electric pumps means that power is not necessary. You can use this system anyplace you have a water source.
The first key to this system is the growing medium. It must have a strong wicking property. Soil or compost will not work. A soilless mix with the correct properties is necessary. I use a commercial product called PRO-MIX BX with MYCORRHIZAE. It consists of Canadian Sphagnum peat moss, Perlite, Vermiculite, dolomitic limestone, wetting agent, and Mycorrhizae.
Other Peat based or coconut coir soilless growing mixes will also work – but the addition of perlite and dolomite lime is recommended.
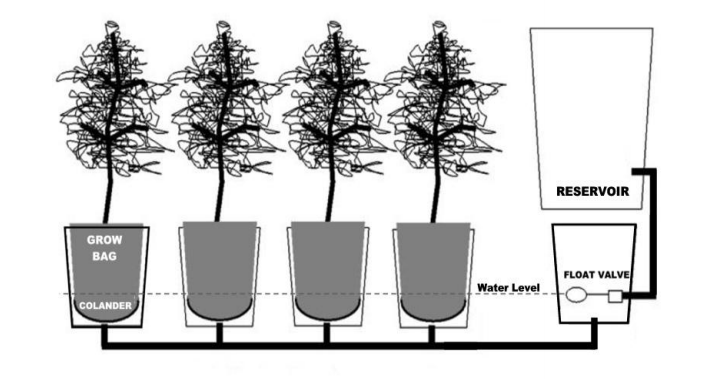
Several Grow Buckets can be combined in a system and connected to a water barrel for automatic irrigation. A float valve regulator is used to maintain the optimal water level throughout the system.
As the water is drawn up and absorbed by the plants the float will drop and open the valve replenishing the system automatically. My system has a 35 gallon reservoir that I refill once a week. See the detailed diagrams at the end of this guide.
The second key to this design is the fabric grow bag. The bags I use can be found at most supermarkets and are very inexpensive or free. The bags are made from spun polypropylene and should last for several years. Similar grow bags are available from nursery and garden suppliers. Canvas or burlap bags may also work – but they will eventually rot and fall apart. The porous fabric allows excess water drainage and aeration of the root zone which is necessary for optimal growing conditions….

The system is also based on the principle of “air root pruning”. As roots grow out to the porous fabric they become exposed to air, dry out and die. This causes the plant to produce dense fine feeder roots and prevents root circling. The increase in fine feeder roots leads to better nutrient and water absorption and promotes accelerated plant growth.
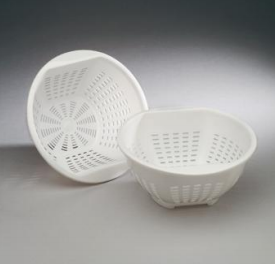
The third key to this system is a plastic kitchen colander, that will hold the fabric shopping bag off of the bottom of the bucket and create a shallow water reservoir in each grow bucket. Almost any large plastic colander can be trimmed to fit inside a 5 gallon bucket with a strong pair of shears. The colander included in all Alaska Grow Buckets kits fit perfectly without trimming…
The fourth key to this system is the 5 gallon support bucket with plenty of ventilation holes around the sides. The bucket helps support the fabric bag and the ventilation holes allow adequate air movement. This allows oxygen to reach the root zone which is essential for optimal plant growth. The bucket also acts as a water reservoir below the bag providing a water source for the wicking grow medium. By maintaining the proper water level with the float valve regulator the medium will never dry out and will continuously wick moisture up to the root-zone…
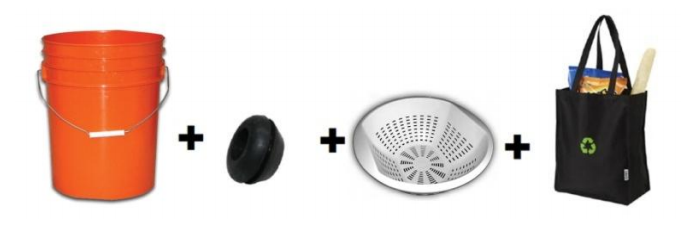
Materials List…
1. 5 gallon Plastic Bucket
2. 1/2″ rubber grommet
3. 10″ plastic Colander
4. Fabric shopping bag
I strongly encourage that gardeners find and re-purpose used buckets whenever possible and help us to keep plastic containers out of our landfills. Look for the Type 2 HDPE symbol on the bottom to indicate the plastic is safe to use for growing vegetables.
Many bakeries and restaurants have free or very low cost buckets available. Free used buckets are a great way to save. I get new 5 Gallon buckets from Home Depot at a very low price. You can find the rubber grommets, barbed fittings, vinyl tubing, and other parts from many online or local garden suppliers. The fabric grow bags that I use are available at many supermarkets.
Most large plastic colanders can be trimmed to fit in a bucket. All Alaska Grow Buckets kits come with special colanders that fit inside a 5 Gallon bucket without trimming. Complete Alaska Grow Bucket material kits are available here.
Tools…
1. 3/4″ Step Drill bit
2. Electric drill
3. Heavy shears or snips if you need to trim a plastic colander.
Construction…
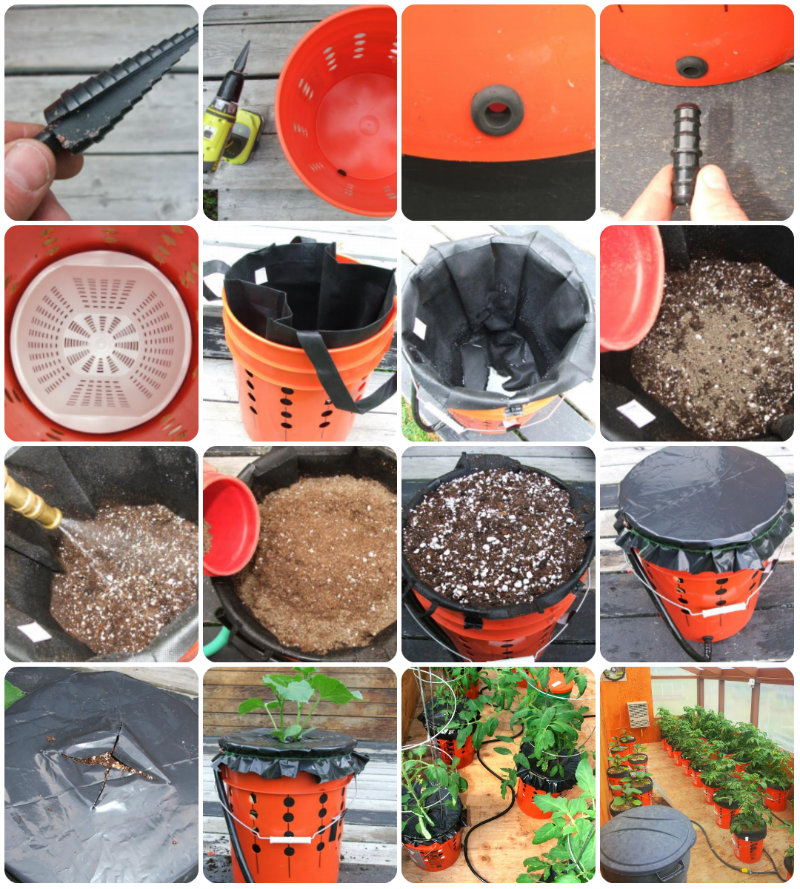
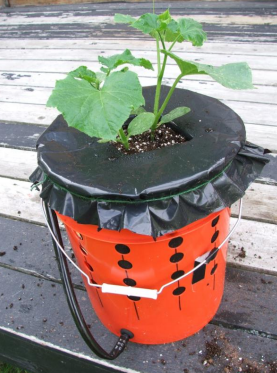
1. Drill a series of 3/4 inch holes in the bucket as illustrated. Drill as many holes as you like starting 6 inches from the bottom of the bucket. These holes along with the porous fabric bag provide air to the root system and that is the key to this design.
2. The lower portion of the bucket has only one opening. This is the water reservoir. You will drill one hole at the very bottom, with your step drill bit for your fill hose fitting.
3. Add a 1/2 inch barbed hose fitting to the grommet. This should provide a snug watertight fitting. Your fitting may differ depending on how you connect your buckets – 1/2 inch barbed fittings are available from hydroponic suppliers.
4. Place the special Alaska Grow Buckets plastic colander inside your bucket or trim other colanders to fit.
5. Place the fabric bag inside the bucket. I trimmed off the shopping bag handles.
6. Plug the fill hole and add water to the bottom of your bucket and begin adding your growing mix.
7. Fill the bucket in layers and soak each layer well to activate the wicking property of your soilless mix. Dry mix will not work.
8. Add a layer of slow release natural fertilizer to the bottom layer of grow mix.
9. An additional ring of fertilizer should be added near the top.
10. Continue adding layers of grow mix and wetting down with water.
11.A plastic sheet is added to reduce water loss through evaporation.
12. Cut slits in the plastic for planting.
13. I chose a nice looking Alaska grown cucumber that I purchased from a local garden center to test my design.
14. The bucket was attached to my greenhouse auto-fill reservoir system.
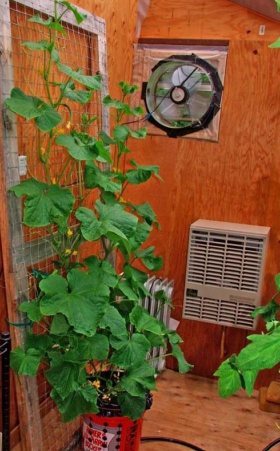
This photo was taken about 4 weeks after planting in my Alaska Grow Bucket. I believe the results speak for themselves…
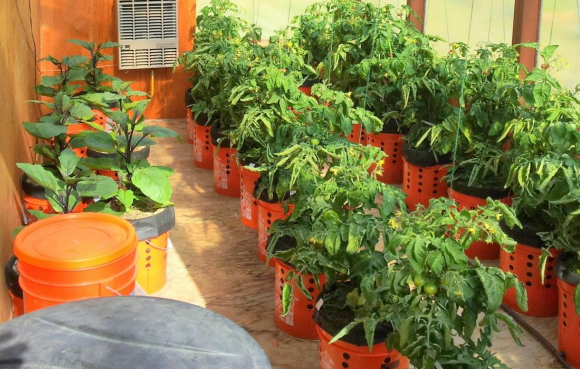
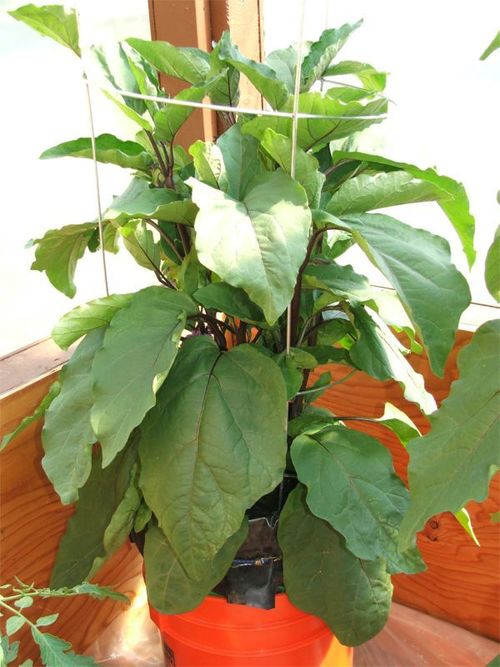
The key to setting up an Alaska Grow Bucket multi container system depends on a simple float valve regulator and a bulk reservoir for automatic watering…
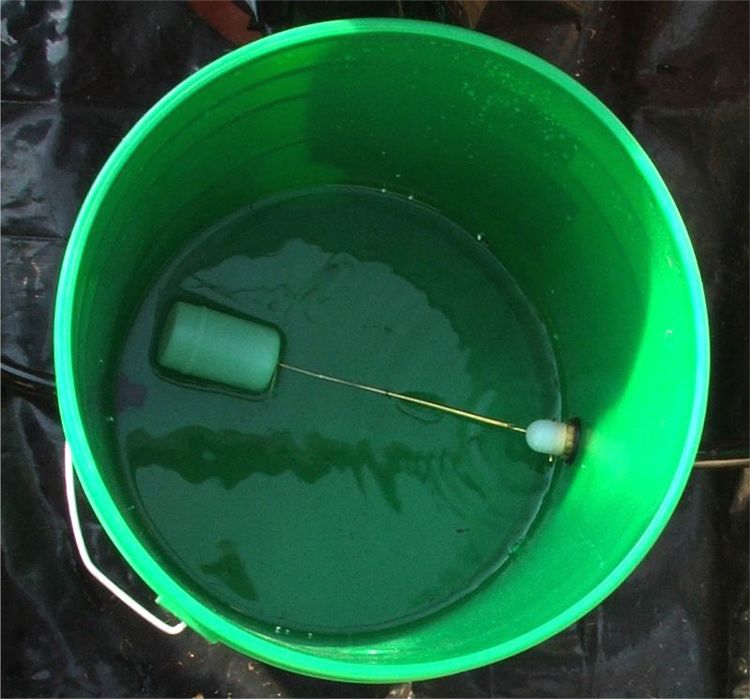
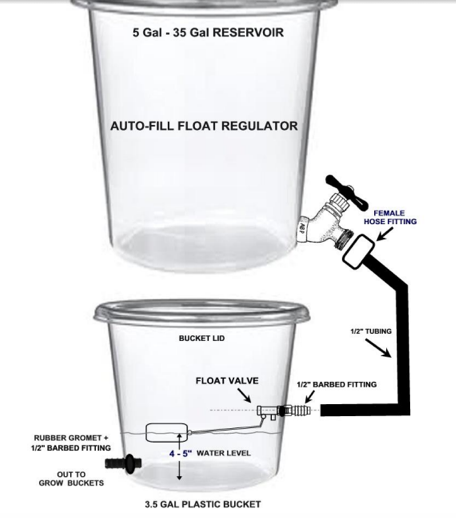
You can add as many Grow Buckets in your system as space allows, but remember to leave enough space for the plants to grow with adequate air movement for ventilation and to remove excess humidity. Overcrowding impedes ventilation and promotes the spread of fungal disease and blocks light transmission within the plants…
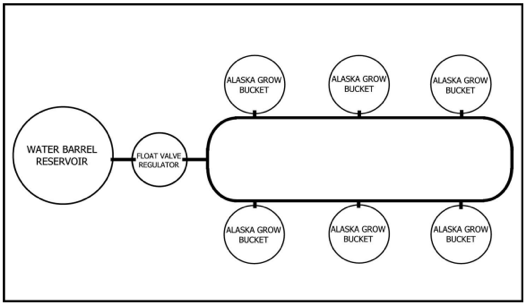
Nutrients can be added in the form of a dry natural slow release fertilizer added to the growing mix or as a water soluble nutrient added to the water reservoir. Any hydroponic reference guide will give nutrient requirements for specific plants. Here’s a short video showing how they’re made…
If you like this idea, be sure to share it with your friends and inspire someone you know. Anything becomes possible with just a little inspiration…
